
A camera object represents the point of view the render layer will be drawn on the screen. Based on the type of lens the projection will be adjusted to achieve either a 2d, 2.5d or 3d perspective. Using cameras you can also render to texture (RTT); a frame buffer can be created allowing you to draw off screen the scene based on the camera view. This gives you the opportunity to create a wide range of post-processing effects, use deferred rendering and a lot more.
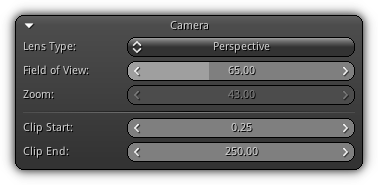
Lens Type: The type of lens the camera should use. Select between Perspective and Orthographic. Refer to the table below to learn more theses lens type and which one is more appropriate for which task.
Field of View: The camera lens angle in degree.
Zoom: Available when using and Orthographic lens; this parameter allows you to increase or decrease the scale of the projection matrix.
Clip Start: The near clipping plane distance.
Clip End: The far clipping plane distance.
Lens Type
| Lens | Description |
|---|---|
Perspective | Is an approximate representation, generally on a flat surface, of an image as it is seen by the eye. The two most characteristic features of perspective are that objects are smaller as their distance from the observer increases; and that they are subject to foreshortening, meaning that an object's dimensions along the line of sight are shorter than its dimensions across the line of sight. Wikipedia 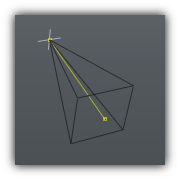
|
Orthographic | Orthographic projection (or orthogonal projection) is a means of representing a three-dimensional object in two dimensions. It is a form of parallel projection, where all the projection lines are orthogonal to the projection plane, resulting in every plane of the scene appearing in affine transformation on the viewing surface. Wikipedia 
|
Orthographic
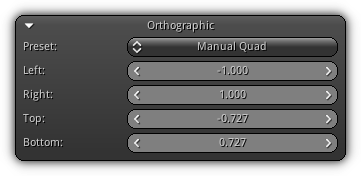
Preset: Select between various presets that are commonly used when using an orthographic project. Choose between Screen Ratio, which is the default 2d projection mode used by the View 3d. FullScreen 2d that gives you a 1/1 ratio over the pixels on screen; this mode is ideal for 2d interface HUD etc... It is the mode used by the NRGeditor to draw the GUI. Finally Manual Quad which override the Camera projection matrix update and allow you to specify the left, right, top and bottom value of the ortho. projection. This mode is ideal when dealing with rendering technique such as "Cascaded Shadow Maps" where the bounding box of the ortho. projection have to be calculated manually.
Left: Left value to use for the orthographic projection.
Right: Right value to use for the orthographic projection.
Top: Top value to use for the orthographic projection.
Bottom: Bottom value to use for the orthographic projection.
Framebuffer
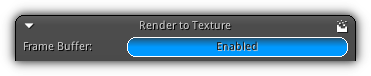
Frame Buffer: Enable or disable render to texture for the active camera. In the event that you want to manually rebuild the active frame buffer simply press the ![]() icon; which will cause a full cleanup and complete reconstruction of the FBO.
icon; which will cause a full cleanup and complete reconstruction of the FBO.
Storage
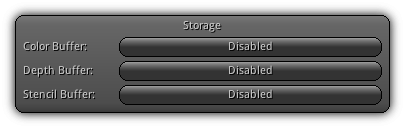
Color Buffer: Add a color buffer to the active frame buffer that will be to draw the RGBA result directly on the screen; waving the need of using a fullscreen quad to draw.
Depth Buffer: Create a depth buffer to use when drawing using the active frame buffer.
Stencil Buffer: Create a stencil buffer to use when drawing.
- Note
- For
DepthandStencilbuffers the setting will only be used if noDepth/Stencilattachment is provided (see the Attachments section below for more information).
Resolution
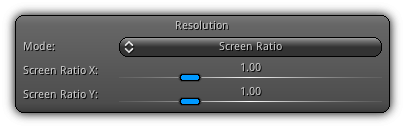
Mode: Determine the way to calculate the size of the frame buffer output; select between Screen Ratio or Fixed Size. Screen Ratio will use the current viewport size and scale the frame buffer output based on the ratio XY provided. Custom Size allows you to specify a fixed dimension in pixels to use as the frame buffer output.
Screen Ratio X/Storage Width: Based on the resolution mode selected this field will either be interpreted as the screen ratio on the X axis or the storage size in pixel (width value).
Screen Ratio Y/Storage Height: Based on the resolution mode selected this field will either be interpreted as the screen ratio on the Y axis or the storage size in pixel (height value).
Attachments
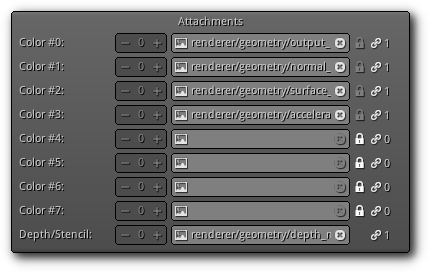
In this section, you can specify the texture attachments of the frame buffer. There is basically two type of attachment that can be set; either a color attachment or a depth stencil attachment. Based on the slot number the texture specified can then be written independently using a shader; this will allow you to store different pixel data based on the texture(s) set in this section.
Color #: Set the 2d texture attachment color buffer rendering target for the active framebuffer.
Depth/Stencil: Specify the depth/stencil rendering target for the framebuffer; either a depth only or depth/stencil texture attachment.
For both Color and Depth/Stencil attachements, if your texture is a texture3D or a texture2DArray you can select which slice you want the slot to render to using the ![]() and
and ![]() icon.
icon.
To transfer the content of the framebuffer back to the texmap texel data toggle the ![]() icon on or off. Take note that this option is not available for depth/stencil attachments.
icon on or off. Take note that this option is not available for depth/stencil attachments.
The last icon on the right is the reference count number for the asset that is displayed at the other end of the ![]() icon.
icon.
Events
| Callback | Description |
|---|---|
OnBegin() | Triggered when a camera is about to draw using a FrameBuffer. |
OnEnd() | Occurs when the camera is done drawing using a FrameBuffer. |
Occlusion
To ensure that your camera is always looking at a specific target the camera system provides you a redirection mechanism if this target become obstructed.
Occlusion and redirection work by attaching a Ray and multiple Camera to your object. If the ray in attachment to your camera detects an occlusion the system will check which another camera (also in attachment) is available based on its priority.
Here's a quick rundown of how to set up camera occlusion and redirection:
1. Create a `Camera` (name it ie. `main_camera`).
2. Create a `Ray` and set it up.
3. Attach the ray object to the `main_camera` object (using `Ctrl+R`).
4. Create another camera and name it `secondary`.
5. Attach `secondary` to the `main_camera` (using `Ctrl+R`).
6. Connect `main_camera` to be used as a render layer camera.
At playback time main_camera will be used by the render layer; if the Ray detect an occlusion it will automatically switch to the secondary camera.
In order to handle more complex scenarios; each camera attached to the root can also use a ray to determine if the target they are pointing at is occluded. To specify which secondary camera should be used first/next you can set its object priority.
If the highest priority camera returned by the system is also occluded the system will continue to the next entry on the priority list until it found a camera that is not occluded.
- Remarks
- If all secondary cameras fail because they are all occluded the system will return back the root camera. It is recommended that you create a
fail-safecamera to ensure that it will be returned in case all others are occluded.
|
|