
Probes are visual objects that can perform render to texture operations; they are rendering offscreen to either a 2D texture (Planar) or a cube map (Environment). They are ideal to create effects such as reflections, projectors, shadow maps (either simple or cascading as well as point light shadow maps by using cube maps) or to simulate (ie) surveillance cameras that record a different part of the scene etc...
When placed on a render layer that does not have any camera attached they will indicate that this layer will have to be treated as a Probe Pass; as a result the layer will draw the scene from the point of view of all active probes located on it.
If a render layer does have a camera and a probe is present the render layer will draw first the probes and then proceed with regular drawing. It is good practice thought to place all probes on a single render layer (that does not have a camera attached) and process them all in batch instead of scattering them on multiple layers.
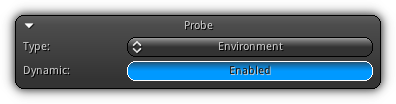
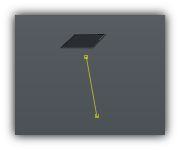
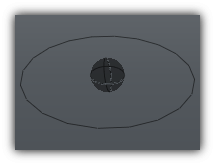
Type: The type of probe; select between either Planar or Environment. Planar will act as a single camera that will render to texture from the probe point of view. The type Environment will render the probe object surroundings to a cube map and act as multiple cameras capturing an image for each face of the cube.
 |
 |
||
Dynamic: Set if the active probe should either be updated dynamically (render to texture) or simply use existing assets.
Sampler Settings
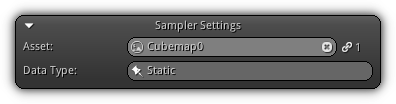
Asset: Select an existing asset for the type of probe; either a cube map or an existing texture.
Data Type: Display the active sampler data type (read only).
Capture Settings

Since rendering the scene from the probe point of view might be costly; this section allows you to independently set the capture rate of each face. For planar only Negative Z is available but for environment probe, each face of the cube can be set manually. To tweak a face capture settings first select it from the combo box; then adjust its capture rate in Hertz. To enable or disable the drawing of a specific face toggle on/off the ![]() icon.
icon.
Debug Draw: Editor only flag used for debug drawing. This option allows you to select which color or depth attachment you want the View3d to use at editing time.
- Note
- An update rate of 0Hz represent that the face will be updated each frame.
Camera Settings
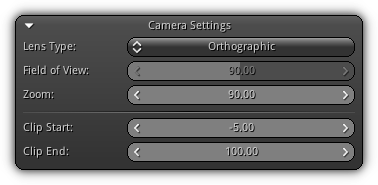
Lens Type: Available when the probe type is set to Planar; the lens type represents the type of perspective matrix that the probe should be using (just like a regular camera object). For more information about each projection please refer to the Lens Type table.
Field of View: Also only available for Planar probes, this value allows you to set the camera lens in degree (Perspective lens type only).
Zoom: Available when the lens type is set to Orthographic for Planar probes; this value controls the scale factor of the orthographic projection.
Clip Start: The near clipping plane distance.
Clip End: The far clipping plane distance.
Orthographic Settings
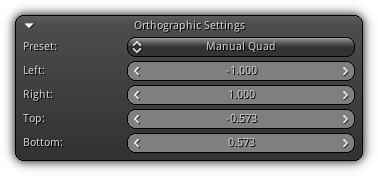
Preset: Available for Planar probes that are using an Orthographic lens; theses presets available are most commonly used when using a 2d projection. Choose between Screen Ratio, which is the default 2d projection mode used by the View 3d. FullScreen 2d that gives you a 1/1 ratio over the pixels on screen; this mode is ideal for GUI or pixel dependent designs. Manual Quad override the camera projection matrix update and allow you to specify each coordinate of the orthographic quad.
Left: Left value to use for the orthographic projection.
Right: Right value to use for the orthographic projection.
Top: Top value to use for the orthographic projection.
Bottom: Bottom value to use for the orthographic projection.
Framebuffer Settings
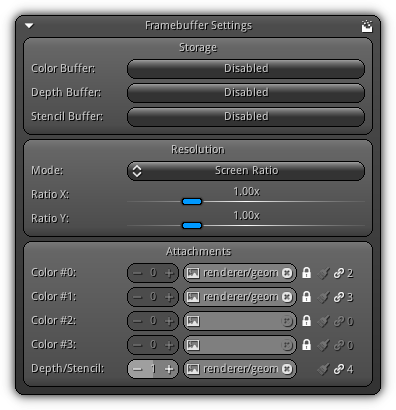
The settings found in this section are exactly the same as the one found for the camera framebuffer. When a probe is dynamic an internal camera structure and framebuffer is created to render to texture the surrounding of the active probe.
For additional information visit the Framebuffer section of the camera help page.
Attachments
Color #: Set the color buffer rendering targets for the active probe framebuffer. For planar select a valid texture attachment, for environment a valid dynamic cube map.
Depth/Stencil: Specify the depth/stencil rendering target for the active probe; either a depth only or depth/stencil dynamic cube map (environment); or a valid depth or depth/stencil texture attachment for planar probes.
For both color and depth/stencil attachments either click on the ![]() or
or ![]() icon (based on the active probe type) to populate the list of the associated asset type. To clear the active connection between the slot and the asset press the
icon (based on the active probe type) to populate the list of the associated asset type. To clear the active connection between the slot and the asset press the ![]() ; the reference count number for the asset will be displayed on the right side of the
; the reference count number for the asset will be displayed on the right side of the ![]() icon.
icon.
Render Layers
Toggle each render layers that should be drawn when the probe is rendering the scene. This approach allows you to carefully select what will be entitled to be part of the rendering process for each probe. Based on that selection the probes can perform independent drawing tasks based on the active layer selected. For example, to perform shadow mapping capture(s) on a single layer by only outputting the depth; perform reflection only by drawing only shaded colors on another layer, or even create a full rendering pass of all render layer to draw another part of the scene monitored by a surveillance camera etc...
|
|