
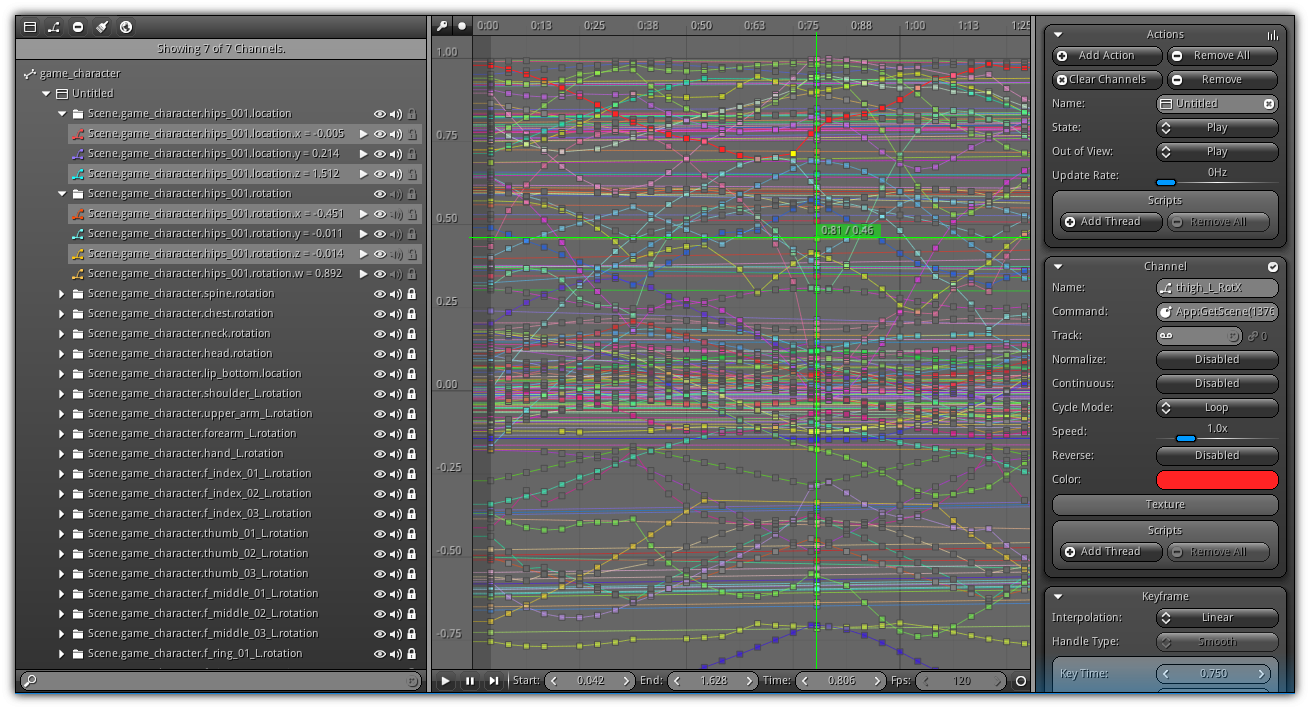
The timeline editor is a visual tool that allows you to create and manage linear actions and edit curves and tracks. It is organized in a similar fashion as the other editors; on the left side, a 2d representation of the objects contained in your scene is organized in a tree. The center area contains the curve editor where you can visualize and edit keyframes.
At the bottom of the curve editor, standard playback buttons can be found, giving you access to preview the current animation(s) you are working on. On the right is the side panel that allows you to modified properties and settings using the current editor mode and your current selection.
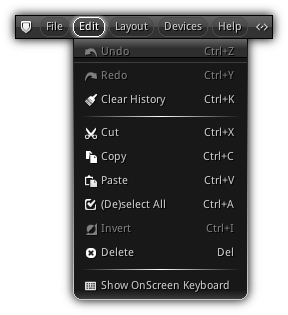
Edit
| Item | Shortcut | Action |
|---|---|---|
| Cut | Ctrl+X | Delete the current keyframe selection and store the necessary script to reconstruct them into the clipboard. |
| Copy | Ctrl+C | Generate the scripting command to reproduce the current keyframe selection. |
| Paste | Ctrl+V | Available if the clipboard contain a script generated from an animation editor; you can paste the content to the curves area to recreate the keyframes contained in the clipboard. When a paste operation occurs, the system will first try to find existing channels that contains the same scripting code used during the copy operation. If no channel is found in the active action a new channel will be generated and the keyframes previously copied will be restored. |
| (De)select All | Ctrl+A | Select/deselect all keyframes from the curves area. |
| Invert | Ctrl+I | Invert the current keyframe selection (if any). |
| Delete | Del | Delete all selected keyframe. |
Menu

Menu: Popup the associated menu allowing you to control the view, the selection and to facilitate keyframes manipulation.
Modes: Allows you to switch between Action View where you can edit curves, add, insert and manipulate keyframes independently; or Summary View (aka. Dope Sheet) which gives you a higher level view of the active action, this animation editor also allows you to duplicate, move and transform keyframes in bulk and more.
Action: The default action of the Left Button (or single touche). Setting the action will control if you are selecting, panning, zooming or moving the timeline cursor.
Control: Specify how to operate the keyframe selection, select between translate, rotate or scale.
Options: Provides additional display options allowing you to resolve scripting commands to actual names; display variables values in realtime and consolidate vectors into folders.
Info: Display the current grid offset location as well as the active zoom factor on the X and Y axis respectively.
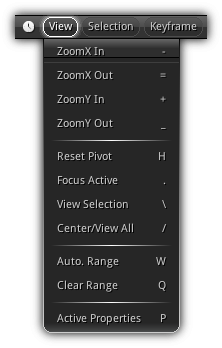
View
| Item | Shortcut | Action |
|---|---|---|
| ZoomX In | - | Increase the X axis zoom. |
| ZoomX Out | = | Decrease the X axis zoom. |
| ZoomY In | + | Increase the Y axis zoom. |
| ZoomY Out | _ | Decrease the Y axis zoom. |
| Reset Pivot | H | Reset back to view to 0,0 and the zoom to 1:1. |
| Focus Active | . | Adjust the view position and scale to focus the current active keyframe. |
| View Selection | \ | Calibrate the zoom and center position to encapsulate all selected keyframes. |
| Center/View All | / | View all active keyframes currently visible. |
| Auto. Range | W | Automatically set the time start and end time using the active action keyframe range. |
| Clear Range | Q | Reset the timeline start and end value. |
| Active Properties | P | Show/hide the right side properties panel. |
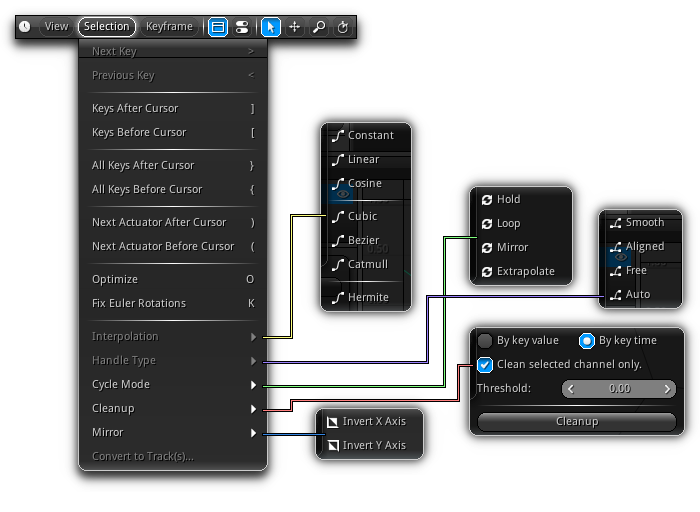
Selection
| Item | Shortcut | Action |
|---|---|---|
| Next Key | > | Activate the next keyframe. |
| Previous Key | < | Set the previous key as active. |
| Keys After Cursor | ] | Select all keyframes from the active channel that have a greater or equal time as the timeline cursor. |
| Keys Before Cursor | [ | Select all keyframes from the active channel that have a lower or equal time as the timeline cursor. |
| All Keys After Cursor | } | Select all keyframes from all visible channels that have a greater or equal time as the timeline cursor. |
| Keys Before Cursor | { | Select all keyframes from all visible channels that have a lower or equal time as the timeline cursor. |
| Next Actuator After Cursor | ) | Move the cursor to the closest actuator of a channel after the active playback time. |
| Next Actuator Before Cursor | ( | Move the cursor to the closests actuator of a channel before the active playback time. |
| Optimize | O | Optimize the active channel. The optimization process will automatically remove all keys that are duplicated over the curve and will eliminate redundancies. Consequently the curve will only contains the keyframes that have a direct impact on its output value. |
| Fix Euler Rotations | K | Fix discontinuity for rotational curve(s) that are based on Euler angles.
Before: 
After: 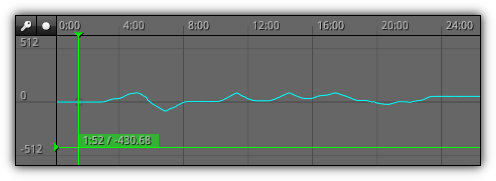
|
| Interpolation | Set the interpolation method for all selected keyframes. | |
| Handle Type | Change the handle type of all selected keyframes. | |
| Cycle Mode | Set the cycle mode for all selected channels.
| |
| Clean Up | Display the advanced cleanup dialog to manually optimize curves by either key value or time using a specific threshold. | |
| Mirror | Mirror all keyframes of each visible (and selected) channel(s) either on the X or Y axis. | |
| Convert to Track(s)... | Display the Convert Curve(s) to Track(s) dialog giving you the opportunity to convert existing curve(s) connected to a channel into a Track (a reusable asset). If the active selection is on action and not a specific channel; all channels within the action will be converted to tracks (only if the channel is not actually connected to an existing track) which is ideal for re-targeting. |
- Note
- When jumping to the previous or next actuator of a channel application playback time and animations will be adjusted accordingly to enable the trigger.
Interpolation
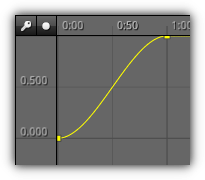
A different interpolation method can be applied to each and every keyframe. It dictates how two keyframes will interpolate between each other. The is basically three kinds of interpolation. Fixed which provides only one way to interpolate between two values; With Handles that allows you to tweak either the left or right side by manipulating the handles values and With Handles + Tension & Bias which also provides handles and extra parameters to increase or decrease the tension and bias of the curve.
| Fixed | |||
|---|---|---|---|
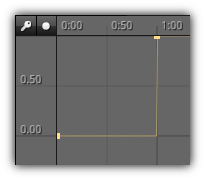
Contstant | 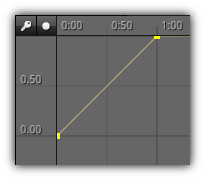
Linear | 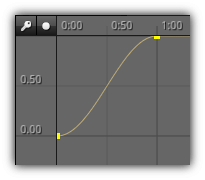
Cosine | |
Bend | 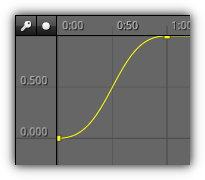
Parametric |
| With Handles | |||
|---|---|---|---|
Cubic | 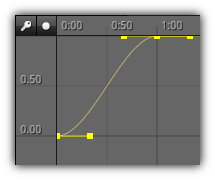
Bezier | 
Catmull |
| With Handles + Tension | |||
|---|---|---|---|

Hermite |
Handle Types
When a keyframe interpolation method allows you to use handles, you can set their type on a per keyframe basis. There is basically three type of handle you can use.
Smooth: Keep both left and right handles in sync. for smooth interpolation.
Aligned: Align both the left and the right handle while they are being transformed.
Free: Allows you to manipulate the left and right handles independently.
Auto.: Adjust both left and right handle to keep the transition between keyframes as smooth as possible. Consequently, the left and right handles are moving in sync. and cannot be manipulated independently.
Handles can be selected independently (except if the handle type is Auto.. By default, when a keyframe is selected and handles are available both left and right handles will also be selected. Clicking on the left or right handle will deselect the other so you can move it freely. To append another handle to the current handle selection hold Shift while selecting it.
Cycle Modes
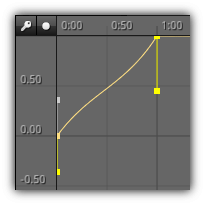
Contrarily as interpolation methods, cycle modes can only be applied on a channel's curve and not the keyframes. It determines what to do when the curve ends its cycle. You can choose between four unique cycle modes.
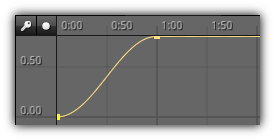
Hold: Will keep the last value when the cycle end. |
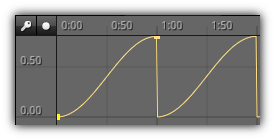
Loop: Rewind itself at each cycle by restarting from the first keyframe. |
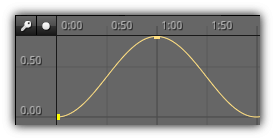
Mirror: Will repeat itself be in the opposite direction. |
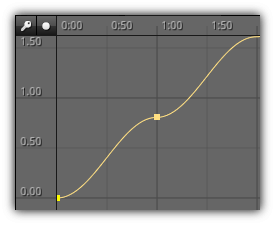
Extrapolate: Continue to increase the values of the curve exponentially at each cycle. |
Clean Up
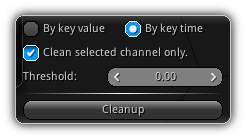
Allow you to manually optimize one or multiple channels either by key value or by time. Contrarily to the automatic optimization available within the Selection menu, this dialog gives you more control on what to remove and what to keep.
By key value: Use the key value to determine if two keyframes in proximity are below the threshold value.
By key time: Use the key time to determine if two keyframes in proximity are below the threshold value.
Clean selected channel only.: Determine to either clean the active channel selected or all visible channels for the current action.
Threshold: The value (min. distance) to use to determine if two keyframes meet the condition to be removed.
Cleanup: Run the cleanup script.
Convert to Track
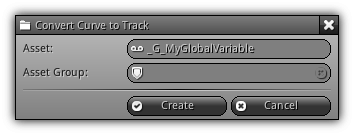
Convert an existing curve (local to a channel) to a track (an asset) that can be reused by multiple resources simultaneously. To cancel the operation simply click the Cancel or the top right X button.
Asset: A unique track name to identify the new asset.
Asset Group: The group where to place the new track. You can either enter a folder name manually; or click the ![]() icon to open the file explorer in folder mode to select an existing group contained within the application root directory.
icon to open the file explorer in folder mode to select an existing group contained within the application root directory.
Create: Confirm the operation and create a new track using the current curve keyframes. Therefore, the active channel will now be linked to the newly created track.
- Note
- If the asset group you specify does not exist it will be created automatically.
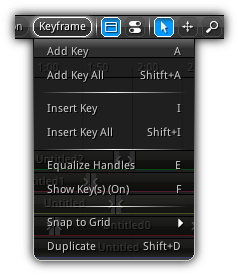
Keyframe
| Item | Shortcut | Action |
|---|---|---|
| Add Key | A | Add a key to the current active channel at the time and value of the cursor location. |
| Add Key All | Shift+A | Add a key to all visible channel curves at the time and value of the cursor location. |
| Insert Key | I | Insert a keyframe taking in consideration the previous and next keyframe value. |
| Insert Key All | Shift+I | Insert a keyframe to all visible channel's curve creating a soft cut between the previous and next frame. |
| Equalize Handles | E | Equalize the handles of all selected keyframe(s) only if the Interpolation is greater or equal than Cubic. |
| Show Key(s) | F | Show/hide channel value. |
| Snap to Grid | Snap the current keyframe selection based on the user preference selected from the pop up menu. | |
| Duplicate | Shift+D | Duplicate the current keyframe selection. |
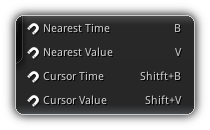
Snap to Grid
| Item | Shortcut | Action |
|---|---|---|
| Nearest time | B | Snap the current keyframe selection to the nearest time on the grid. |
| Nearest value | V | Snap the current keyframe selection to the nearest value on the grid. |
| Cursor time | Shift+B | Snap the current keyframe selection to the current cursor time. |
| Cursor value | Shift+V | Snap the current keyframe selection to the current cursor value. |
- Note
- For
Nearest TimeandNearest Valueyou can control the amount of precision (digits after the.) to be rounded to by pressing either0,1or2on your keyboard. The default rounding digit value is 2.
Modes

| Icon | View | Shortcut | Description |
|---|---|---|---|
| Action | Alt+A | Switch the animation editor to Action View. | |
| Summary | Alt+S | Change the animation editor to Summary View. |
Action
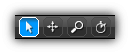
Defines the default action of the left mouse button.
| Icon | Mode | Shortcut | Description |
|---|---|---|---|

| Selection | Use this mode to single or multi-select keyframes from the current channels that are visible. Hold the Left Button and drag to create a marquee selection; release to confirm; use Shift to include or exclude strips from the selection. | |

| Pan | Shift+Alt+Left Button | When pan mode is selected click and drag using your left mouse button. This action will cause the curves area grid to scroll using your pointing device direction. |

| Zoom | Ctrl+Alt+Left Button | Zoom in on a specific axis determined by your pointing device direction (either X, Y or both) by dragging it while holding the Left Button. |

| Scrubber | Alt | Control the timeline time scrubber. |
- Note
- Marquee selection has an alternate mode that can also be used to control the start and end time of the timeline editor. Begin by creating a rectangular selection and hold the
Ctrlkey before releasing your pointing device.
Control

Determine the type of control operations will be used when dragging selected keyframes within the area of the curves.
| Icon | Mode | Shortcut | Description |
|---|---|---|---|

| Translate | T | Toggle the translation mode when dragging selected keyframes. |

| Rotate | R | Toggle the rotation control to use when manipulating selected keyframes. |

| Scale | S | Toggle the scale mode to operate the selected keyframes. |

| Shift | M | Option to shift the keyframe(s) past the active selection during transformation; or hold Ctrl while dragging the active selection. |
- Note
- During any of the operation listed above you can hold
XorYon your keyboard to constraint the axis plane to operate on. In addition, while dragging holdingShiftwill smooth the movement to increase precision.
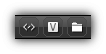
Options
| Icon | Option | Description |
|---|---|---|
| Show Code | When toggled display the scripting command associated to the channels and resolve variable names. If toggled off; will simply display the channel names. | |
| Show Value | Append the current channel value to the name displayed in the treeview and display on the curve graph the active value for each channel as a keyframe. | |
| Consolidate | Collapse all vector components into one folder. |
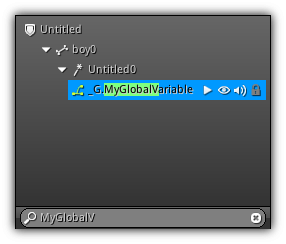
Treeview
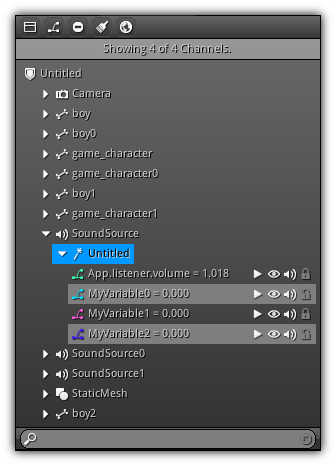
The treeview gives a representation of the objects of your scene and which actions are associated with them. At the top of the treeview, a toolbar provides quick one-click buttons to manage actions and curves. The center contains a 2d listing of all objects and displays their respective action(s) and all curve(s) linked to them. At the bottom a search box allow you to filter the treeview result based on a substring pattern.
- Remarks
- To easily switch between the Action View and Summary View simply double tap the action name. To quickly cycle an action states; first select it then presses the
Space Barto switch to play, pause or stop. To force the system to resolve the command of a channel and automatically select the bone or object associated to it holdCtrlwhile selecting the channel.
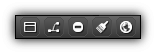
Toolbar
| Icon | Description |
|---|---|
| Create a new action for the active resource. | |
Display the New Channel dialog allowing you to create a new custom channel and add it to the current selected action. | |
| Remove either an existing action or an existing channel depending on the current selection in the treeview. | |
| Clean up the selected action by removing channel(s) that their commands have trigger an error or if the channel does not have any keyframe specified. | |
| Switch between global and local view. Global view display all objects and the content of their animation structure. The local view only display the animation content of the active object; if there is no active object the Application animation is selected automatically. On top of giving you a better view of all actions present within the active scene; the global view also allow you to cross link actions between object. In other words an object can also control variables and properties of another object; impossible in local view as you are editing the active selection. |
New Channel (Manual)

Name: A unique name (within the active action) to use for the channel.
Command: Specify the variable (as a Lua script command) that the channel will control. By default, all variables will be considered a number however by toggling the auto. type ( ![]() ) icon you can force to auto-detect the variable structure type; useful when dealing with vectors (2d/3d/4d), quaternions, colors etc... that require to be affected using a
) icon you can force to auto-detect the variable structure type; useful when dealing with vectors (2d/3d/4d), quaternions, colors etc... that require to be affected using a :Set command.
Once both name and command entered the Create button will become active; clicking on it will create the channel and attach it to the current action. In case you want to abort the operation click the Cancel button to close the dialog.
New Channel (Auto.)
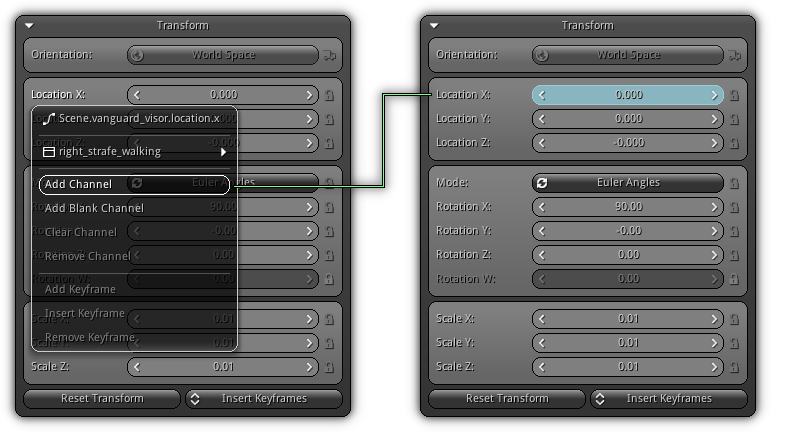
Since a channel is basically a curve that controls a variable via scripting it possible to create automatically a channel for all variables controlled by the editor. To create a new channel automatically simply select an action from the treeview. Once selected you can then use the Left Button on the label of the property that you would like to create a curve for. This action will open the channel popup menu allowing you to create add a new channel to control the variable that this widget is connected to.
| Add Channel | Create a new channel for the current action and add the current value as the first keyframe using the current playback time. |
| Add Blank Channel | Create a blank channel for the action but does not insert any keyframe. |
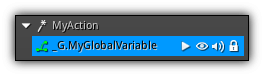
Once the channel created for a variable, selecting the action will highlight the widget background with the same color as the channel allowing to visually identify from the Curves Area which channel control which variable. If you Left click the label again more options is now available to you.
| Clear Channel | Remove all keyframes for the active channel. |
| Remove Channel | Create a blank channel for the action but does not insert any keyframe. |
In addition, by default, if the active animation contains only one action (as the in the screenshot above) the system will automatically select it. If none or more than one action is available the action menu popup will allow you to select an action to process the channel.
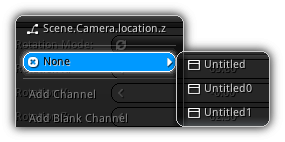
To select the active; open the popup and simply click on an entry. Take note all subsequent related operations will be effectuated on that same selected action.
Add/Insert Keyframe
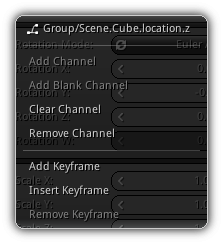
Using the current position of the timeline within the animation editor; if the current playback time is placed at the location of an existing keyframe the insert options will become available:
Add Keyframe | Add a keyframe for the active channel using the current value of the variable at the active playback time (hard cut). |
Insert Keyframe | Smoothly insert a keyframe taking in consideration the previous and the next value on the curve for the active channel using the current value of the variable at the active playback time (soft cut). |
Update Keyframe
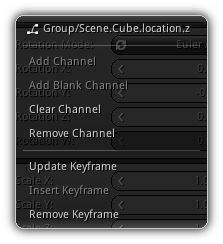
Based on the current position of the timeline within the animation editor; if the current playback time is placed at the location of an existing keyframe the update options will become available:
Update Keyframe | Use the current variable value to update the active keyframe pointed by the playback time. |
Remove Keyframe | Remove the current keyframe at the playback time location. |
Entry
Each channel entry within the treeview will consist of its name or its resolved command line script as well as for distinct option that will directly affect it's current state.
| Icon | Description |
|---|---|
| | Cycle through the channel state play, pause, stop and if the channel is connected to a Track, record ( |
| Control the visibility of the channel within the curves area. | |
| Control if the channel should be muted or not. The channel will still playback (if its state is set to play) but the variable it controls will remain unchanged. | |
| Prevent the channel to be edited within the curves area. The curve will still be drawn but the use cannot modify the keyframes. |
At the exception of the root, channels, and actions names can be changed by pressing Enter on an entry. Actions and channels can also be swapped to change their order within the hierarchy by dragging them on top of one another.
- Note
- To invert the selected state and propagate the result to all other channel hold the
Shiftkey. To batch set the current state to all channels contained in the current action change a state holdingAlt+Shift. Alternatively, when selecting a channel hold theShiftkey to activate it and hide all other curves; subsequent selection will show the curves for the active channel.
Quick Search
Located at the bottom of the treeview the quick search let you highlight entries depending on a specific keyword. Simply type in a string/substring. Therefore all entries containing a match will be highlighted and non-matching entry will become invisible, allowing you to operate on a specific channel working set.
Curves Area
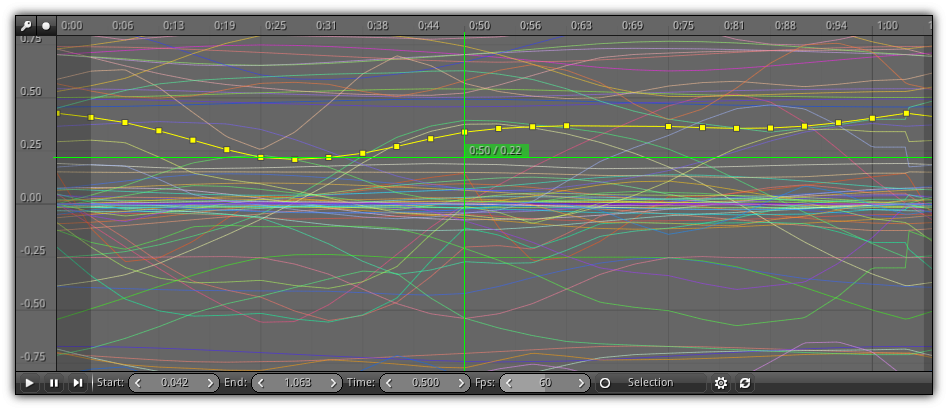
When in Action View, the area of the curves is the dominant section of the animation editor. This is where you can visualize and manage all the curves that belong to the active action selected from the treeview.
It is divided into two sections the top section a dynamic grid that represent the linear timeline on the X-axis and on the Y the value that each curve would reach at a given point in time.
The bottom contains standard playback controls allowing you to either visualize (while the app. is running) or simulate the application time (at editing time) progression. The second is ideal while working on any type of curves as you can simulate each of them in real time and at a different speed.
Keyframe
In addition to the Keyframe Menu; predefined keys and buttons are also available to facilitate keyframes manipulation of an existing channel.
| Shortcut | Description |
|---|---|
Left Button | Select/deselect a keyframe; hold Shift to append to the active selection. Press Ctrl to shift all subsequent keyframes while performing transform operations. |
Ctrl+Left Button | Select all keyframes from a channel curve. |
Left Button 2x | Double click to add new keyframe at the pointing device location. |
Ctrl+Left Button 2x | Add a new keyframe to the active channel curve and move the scrubber at that location. |
Shift+Left Button 2x | Double click to insert a new keyframe at the pointing device location. |
Alt+Left Button 2x | Insert a new keyframe to the active channel curve and move the scrubber at that location. |
Del | Delete the current keyframe selection. |
Backspace | Remove all keyframes from the active channel. |
Auto. Keyframe

With auto. keyframe you can create actions just by simply changing widget properties or dragging manipulators. Each value that changes will automatically add a channel to the active action (if it does not exist already) or update the current keyframe.
You can then drag the timeline cursor then changes the values that you want to use for the specific time. Repeat the operation to create full-fledged action with ease.
- Note
- Opposite as the record functionalities auto. keyframe work for both local curve and tracks.
Record

Recording allows you to record values for a given channel automatically and bake it to a Track. It is ideal if you want to record physics or other types of data that are controlled via scripts overtime avoiding. To start recording in the treeview set all the channels states to record then toggle the button. Then press play to start incrementing the playback time.
- Note
- When baking curves it is recommended to toggle Off the
Sync.properties at the bottom of the curves area control. Like this, you can specify the frame rate to use to record and apply a static time step.
Summary Area
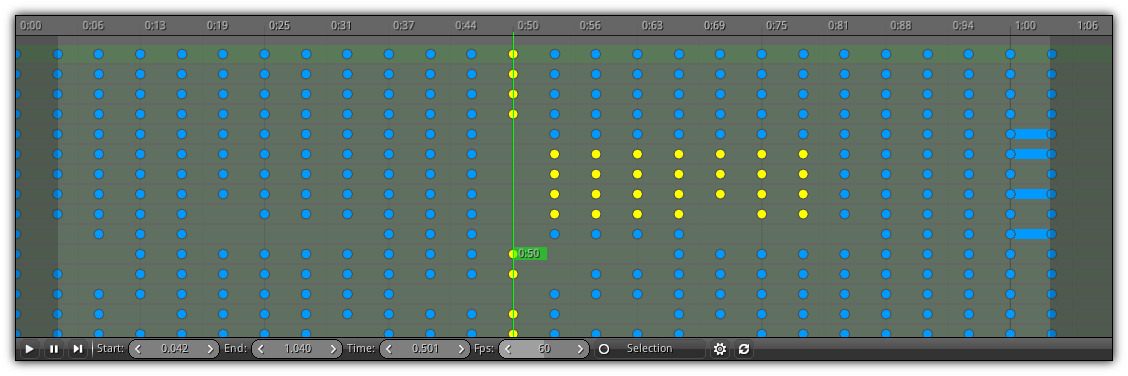
Available when the animation editor active view is set to Summary this layout allows you to manipulate on a higher level all keyframes of the selected action. This editor is ideal to perform keyframe operation in bulk allowing you to transform, duplicate resampling, adjust timing, combine existing action keyframes and more.
The summary view uses the same controls and functionalities as the Curves Area, however, take note this view is focusing only on the timeline of your actions. All value specific functionalities are not available in Summary View; to operate and manipulate values, you will have to switch back to Action View. To quickly switch back you can either use the Modes buttons available in the editor toolbar or by using a simple double click on the action name displayed in the treeview on the left.
Playback Controls

| Icon | Description |
|---|---|
| Start increasing the application playback time; press again to stop and reset it back to 0. | |
| Pause the playback. | |
| Increase the time step of one frame. | |
| Increase physics time step while playing (available when application uses physics). | |
| Force to update sounds and audio effect while playing or scrubbing. | |
Use the editor delta time to update the playback time. When turned off, use the static frame rate delta time specified by the Fps field |
- Note
- To quickly play/pause (or step if the
Shiftkey is pressed) the application playback you can use theSpace Baron your keyboard. As a result, the application time will be updating and physics, particles and other time-related resources such as animations will be updated giving you a real-time preview of your app. To restore the active scene to its original state; you can reload it from the Active Scenes panel.
Start: The playback start time.
End: The playback end time. When the playback reaches this value it will automatically loop back to 0 and restart.
Time: The current application playback time.
Update Rate: When the playback preview is running increase the application time using a static frame rate (requires you to disable sync.).
Selection: Only update existing animations connected to the current object selection.
Active Properties
Located on the right side of the animation editor the active properties will auto. adjust itself using your current selection and the state of the editor. Browse the panel manage and control the different type of resources maintained by the animation edit and to locate additional properties.
Actions
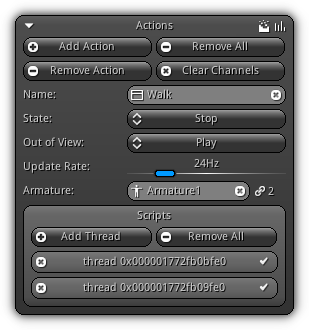
Actions control one or multiple channels where each of them is associated with a scripting command. To drastically improve the runtime performance of an action you can force each channel to directly write to the memory address they control at runtime. To enable this feature simply press the ![]() icon to
icon to Build the action. If keyframe modifications have been effectuated press the ![]() button to recompile the action and update its internal duration.
button to recompile the action and update its internal duration.
However, if a channel is controlling a local, custom variables (which cannot be resolved internally) or internally call a function (such as ie: Sfx.soundsettings.doppler_factor; the memory address cannot be resolved and the channel will have no effect during playback.
Here simply let the system run the raw scripting command internally by setting this option off. It is recommended to use the Build feature for actions that contains a large number of channels (including in bone animation) that might impact performance.
Add Action: Add a new action to the active animation.
Remove All: Remove all existing actions contained in the active animation.
Remove Action: Remove the active action.
Clear Channels: Clear all the channels connected to the active action.
Name: A unique name that represents the action within the current object action list.
State: The current state of the action. Select between play, pause or stop; when the action loads this state will automatically be affected.
Out of View: Available only when the animation containing the action is associated with an object. This property allows you to control the state of the action when the object is invisible or outside the camera frustum.
Update Rate: The refresh rate of the action in Hertz; take note by default actions are linear and do not have an independent timing/syncing system as they are strictly controlled by the application time. Please refer to non-linear actions (aka AnimationController) for more flexibility over actions.
Armature: Available only when the active animation is associated to a skeletal mesh; the armature provides a way to exclude joints from the skeleton preventing them to take part in the action playback.
- Remarks
- Both armature and skeletal mesh need to be connected to the same skeleton.
- Warning
- When an action is controlled by an
ActionControllerthe State and Out of View state will be set toStopautomatically.
Scripts
Manage the scripts connected to this action. For more information please refer to the Scripts help section. Scripts connected to an action will respond to the following callbacks:
| Callback | Description |
|---|---|
OnPlay() | The action starts playing. |
OnPause() | The current action have been paused (its value remains and stop evaluating). |
OnStop() | The current action have stopped evaluating and its playback position return to 0. |
OnResume() | The action was on hold (paused) and the play function have been called. |
OnUpdate() | The current action have been updated and each channel have been reevaluated. |
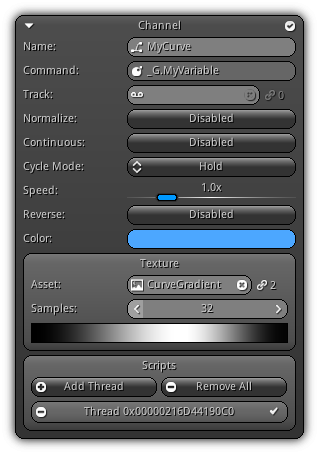
Channel
At any time you can check the active state of a channel by looking at the top right icon. The ![]() icon confirm the code associated to the channel is running properly. In case the code creates an error the channel will stop running and its current state will change to
icon confirm the code associated to the channel is running properly. In case the code creates an error the channel will stop running and its current state will change to error. Take note that you can also monitor the state of a channel from the treeview by checking the left side icon near the channel name.
Even though when editing a channel the time used is the actual application playback time; each channel are actually working using their own local time. In other words, channels are basically independent from the application time, and can run at their own pace.
Name: The unique name of the channel within its action.
Command: The scripting command this channel is using to update the variable it controls.
Track: Determine whether the channel is using a local curve or a track (global asset).
Normalize: Normalize the curve keyframe to the range of -1 to 1 by analyzing the min. and max. value of the curve. Take note that keyframes will still be edited using their non-normalized form.
Continuous: Control if the channel value triggers an update each frame; hence the term continuous update, or only if the value it controls actually changes. This option forces the curve to be re-evaluated every frame and force its associated variable to be updated. Necessary when controlling a transform property of a physic object where ie. Z position is controlled by physics and XY is controlled by an action curve.
Cycle Mode: Specify the cycle mode to use when the last keyframe is reached.
Speed: Control the playback speed of the curve associated to the channel.
Reverse: Playback the curve in reverse.
Color: A color to identify the channel curve on the graph.
Texture
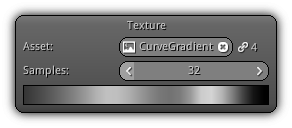
Asset: The texture to used to write the curve data; the texture type cannot be Video or Font and can only work with two dimensional textures (no 3d texture is allowed).
Samples: Numbers of unique curve samples to evaluate when converting the curve to a texture. Increase the number of samples to get a smoother transition.
- Warning
- Mind which texture is associated with which curve; if a texture is linked to multiple curves it will be overwritten. Always keep in mind amounts of links of the texture asset and where they are pointing to.
Scripts
Manage the scripts connected to this channel. For more information about how to operate the Scripts section please refer to the Scripts help. Scripts connected to a channel will respond to the following events:
| Callback | Description |
|---|---|
OnPlay() | The action starts playing. |
OnPause() | The current action have been paused (its value remains and stop evaluating). |
OnStop() | The current action have stopped evaluating and its playback position return to 0. |
OnResume() | The action was on hold (paused) and the play function have been called. |
OnActuator() | Triggered when the channel playback time hit a predefined actuator. |
Keyframe
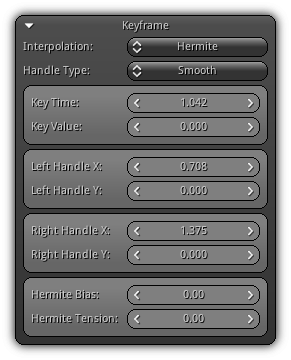
Interpolation: Select the type of Interpolation to use for the active keyframe.
Handle Type: Specify the type of handle to use. For more information refer to the Handle Types section.
Key Time: The playback time of the keyframe.
Key Value: The value for the active keyframe.
Left Handle XY: The position of the left handle on the X and Y axis of the curve area grid.
Right Handle XY: The position of the right handle on the X and Y axis of the curve area grid.
Hermite Bias: Available only when the interpolation type is set to Hermite this extra value allow you to add an arbitrary bias on the keyframe.
Hermite Tension: For Hermite interpolation type only this value adds tension on the keyframe giving you extra flexibility on the smooth factor of the keyframe.
Actuators

Actuators are basically "triggers" that launch the OnActuator() callback when a certain time is reached. They are working directly in conjunction with the script(s) attached to a channel. Actuators can be recursive and are reevaluated based directly on the cycle mode used by the channel.
Using actuators you can (ie) launch a burst of dust or play a sound when the foot of a character reach the floor; or to trigger any type of events when a specific point in time is reached within the channel range; it is entirely up to you.
While adding/removing actuators, is often happen they are not ordered in time. To keep a clean list and avoid extra computation while determining internally if an actuator should be triggered it is good practice to keep them sorted. To sort the current list of actuators for an active channel click the ![]() icon.
icon.
Add Actuator: Insert an actuator at the current location of the timeline cursor.
Remove All: Remove all existing actuators connected to the active channel.
- Note
- You can also insert an actuator by clicking on a time value inside the Curves Area or simply by pressing
Nwhile scrubbing to insert one.
Entry

- Use the spinner to set/tweak the actuator time value.
- To mute the actuator use the
 icon.
icon. - Toggle whether the actuator is recursive by clicking the
 icon.
icon. - To remove the actuator click the
 icon.
icon.
- Note
- Actuators can also be placed by clicking on an arbitrary time at the top of the curves area graph.
|
|