
When you first open NRGeditor, the foremost screen you will probably notice is the project manager. As its name implies, the project manager helps you to manage your existing project(s), and give you the opportunity to publish them to all the platforms supported by NRG. At any time you can have access to the Project Manager by pressing Ctrl+P or from the main menu File > Project Manager. To toggle on/off software update checks on startup press the ![]() icon.
icon.
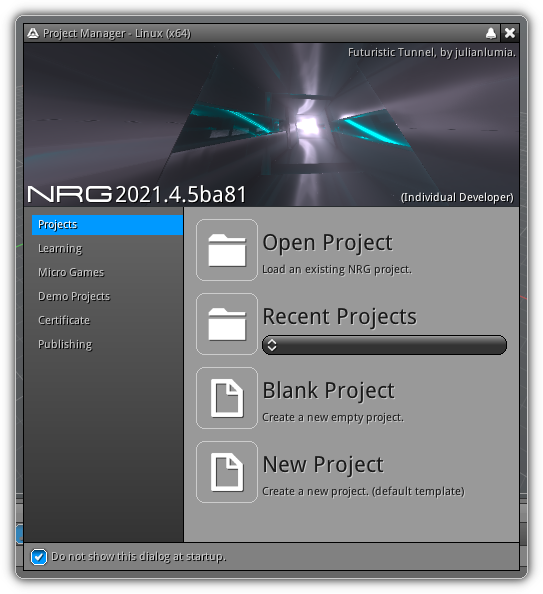
Project
The first tab that can be found on the left side menu of the Project Manager is allows you to access the project section. Under this section you can load recent projects, browse your local files for existing NRG project or NRG package (.npk) files and create either a new blank project or a new project using a default template.
Open Project
To open a project available on your current machine, click the "Open
Project" button. This action will automatically open the File Explorer. NRG projects in their editing forms are basically directories, but you can also open an already packaged NRG project. Packaged NRG projects are identified by the .npk extension and can only be opened in read-only mode or you can be decompressed to turn them into an editable project. For more information about redistributing NRG packages for development please refer to File Menu.
Recent Projects
In the recent projects section, a list of the last projects has been loaded (accessible when clicking the combo box) is available. The editor will automatically keep a chronological record of the projects that you have opened (either folder path or NPK path). To select one from the list simply click on it and the project will be reloaded.
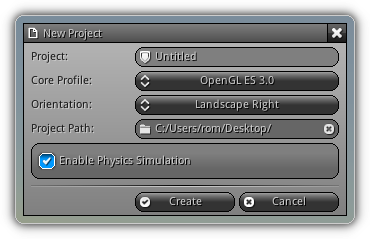
New Project (blank)
Also, accessible from the main menu under File > New Project (or Ctrl+N), this button allows you to open up the "New Project" dialog to create a blank project. This type of project is more suitable for advanced users that already know their way with NRG, if you are starting with NRG use the New Project (default template) button.
| Field | Definition |
|---|---|
| New Project | The name to use for your project; the same name that will be used to create the base directory located at the Project Path you specify. |
| Core Profile | The base OpenGL ES profile you want your application to be compatible with. Please take note this profile is forward compatible. In example a GLES v2.0 profile ensure that your project will run on OpenGL ES v2.0 and OpenGL v2.1. A core profile targeting OpenGL ES v3.0 will insure compatibility between OpenGL ES v3.0 and OpenGL v3.3 and finally a OpenGL ES v3.1 profile will run on a target machine that support GLES v3.1 and OpenGL v4.1 (with compute shader extension available). |
| Orientation | Specify the default orientation to use when your application run on a device that supports multiple screen orientation (mobile device or surface PC). |
| Project Path | click the folder icon on the left side of the project path text box to open the File Explorer in folder selection mode to specify the path where you want your project base directory to be create. |
| Enable Physics Simulation | Specify whether your application will use physics. If toggled a new physic world will automatically be created for you. |
Once you have entered all the mandatory information the Create button will become enabled, click on it to create the base directory for your new project.
New Project (default template)
Similar to the New Project (blank) this option will allow you to create a new project adding by default all the necessary setup to start drawing something on the screen. The default template will automatically create a scene that contains a camera with a drawing script to clear the screen and a render layer. From there you can start by importing an external scene coming from your favorite 3d modeling software. (see the Library for more information about how to import)
Learning

Direct access to the various online learning resources to get you started in no time!
MicroGames

Allows you to download directly the MicroGames that are available at nrgcore.com. By default the MicroGames package will be downloaded under the following directory: <username>./NRGeditor/<MicroGame>.npk. As soon a MicroGame is loaded the NRGeditor will ask you if you want to unpack it; if you simply plan on running it press Cancel; else Confirm the operation. If you choose to unpack the NRG package a corresponding directory will be created next to the .npk location.
This section also gives you quick access to the online presentation and online tutorials related to each MicroGame. If you wish to learn how to build these games from scratch access the online resource by pressing the related presentation icon.
Demo Projects
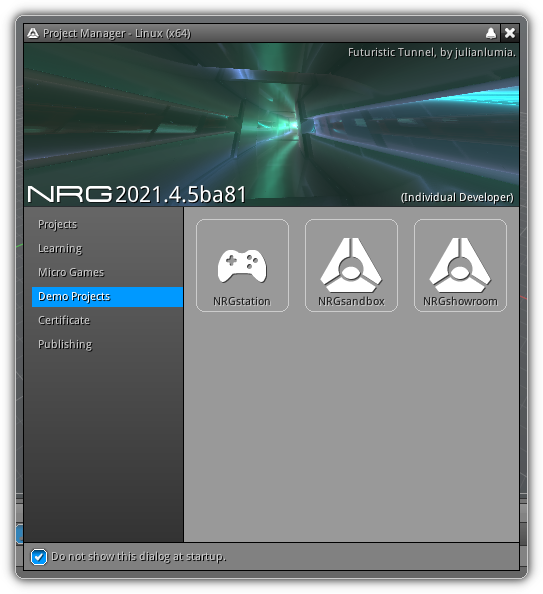
Similar as the MicroGames tab this tab give you direct access to download and load the various demo projects available online straight into the editor. To start downloading a project simply press the corresponding icon (to cancel the download press Esc).
- Note
- Demo projects download are located inside the same directory as the MicroGames.
Certificate
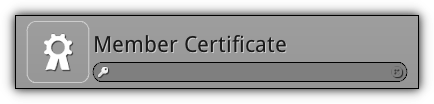
In order to activate the privileges associated with your NRGaccount certificate you have two options. The first is to simply copy & paste your certificate in the textbox and press Enter to confirm it. If you have downloaded your certificate locally press the certificate button and locate it on your device. Upon confirmation of the file the certificate will automatically be listed in the textbox above and the authentication will be processed automatically.
Once your certificate have been authenticated all privileges associated with your subscription will be unlocked automatically.
- Note
- If your certification include publishing functionalities insure that the appropriate NRGplayer package(s) for the platform(s) you are targetting have been downloaded and placed under:
<user home directory>/.NRGeditor/.
Publishing
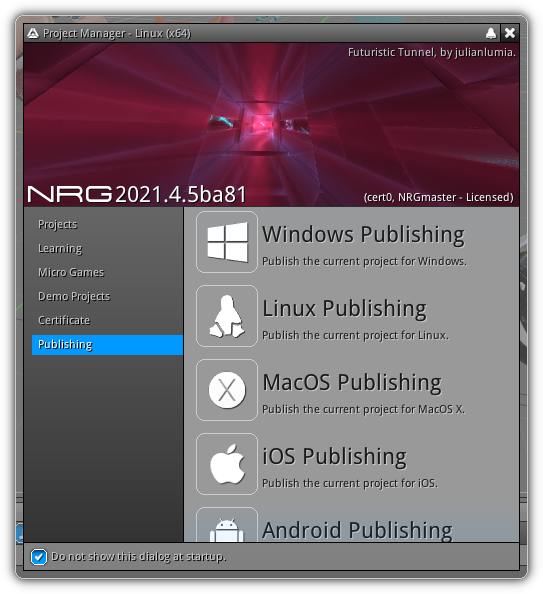
The lower part of the Project Manager dialog is dedicated to publishing. In order to have access to the different platform buttons, you must first have a project loaded and have downloaded the appropriate package from your developer control panel.
Once you're ready, simply click the button associated with the platform you wish to publish to. For each platform you want to distribute your application on a "native" C/C++ project will be created. Before publishing to your favorite platform(s) make sure that you have the proper development environment already installed and setup. Find below the list of IDE that the NRGeditor will automatically generate the project for (listed by platform):
| Platform | Project Type |
|---|---|
| Android | Gradle project can be opened with Android Studio; in addition you will also need to install the Android SDK and NDK. For more information, download and installation instruction visit: http://developer.android.com. |
| Windows | Visual Studio project, no extra installation needed. If you do not already own Visual Studio, you can download the Visual Studio Community at: http://www.visualstudio.com. |
| Linux | Code::Blocks project; please take note depending of the Linux distribution that you are using the installation procedure to install CodeBlocks will vary. Visit http://www.codeblocks.org to download and find detailed installation instructions for your current Linux distribution. |
| iOS/OSX | XCode project; ensure the latest iOS SDK is installed. To download the latest XCode and iOS SDK visit: https://developer.apple.com. In addition, to publish your app on the App Store or to test on a mobile device or Apple TV you need to be a registered Apple developer. |
Once the publishing process is overall you have to do is to open the generated project file with the appropriate IDE and push the build/compile button. After compilation, the executable generated is a fully standalone application for your platform.
Desktop Publishing

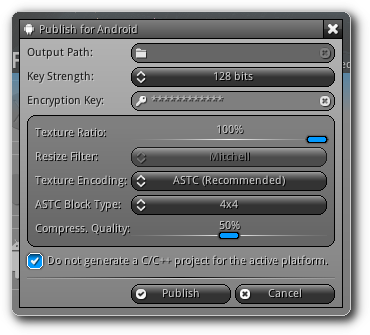
When publishing for desktops (Windows, Linux, OSX) the dialog above will be displayed. To start publishing click the folder icon located on the left side of the "Output Path" widget and select where you want to project files for the selected platform to be placed. Optionally, to secure your work you can provide a password; this password will be used to encrypt the final NRG package file (.npk) and protect your final product.
Output Path: Specify an output path to use to create your final application project.
Key Strength: The strength of the encryption key, the higher the safer but the slower it might take to decrypt the data.
Encryption Key: Basically a password that will be internally used to open the .npk when your application is starting.
| Option | Definition |
|---|---|
| Screen Resolution | Allow you to set the default resolution of the player. |
| Exclusive Mode | Force the windows to be displayed fullscreen in exclusive mode. |
| Texture Ratio | Control the scale factor of the textures used by your project. Take note that only uncompressed textures will be resized. If the texture is already compressed or if it marked to no receive overrides it will be skipped automatically. |
| Resize Filter | Select the filter to use while resizing textures. |
| Texture Encoding | Choose the compression method to use. |
| ASTC Block Type | Available when the texture compression method is set to ASTC; this field will allow you to select the size to use for each compressed blocks. |
| Compression Quality | Control the quality of the compression; the higher the better but the slower it will be to compress the textures. |
- Note
- When compressing textures if the name of your asset contains
normal(for normalmaps) orsurface(for roughness/metallic) the error metrics used by the compressor will automatically be adjusted for this type of textures. In addition when generating mipmaps the compressor will use theMax. Levelparameter that you have set. If the value is0the full mipmap pyramid will be generated; if the value is ie.5only five level will be generated.
Publish: The result of this operation will force all debug information to be removed from scripts; IDE specific parameters and options will be discarded and all asset files will be converted or re-compiled and converted to binary data ready to be directly feeded to the virtual machine, CPU and GPU.
Cancel: Cancel the publishing process.
Do not generate a C/C++ project for the active platform.: Skip the C/C++ project generation process and simply output a release ready .NPK.
Mobile Publishing
When publishing for a mobile device (either iOS or Android at the time of writing), the options available to you are pretty much the same as the one when publishing on a desktop computer; at the exception that no screen parameters are available.
| Option | Definition |
|---|---|
| Texture Ratio | Control the scale factor of the textures used by your project. Take note that only uncompressed textures will be resized. If the texture is already compressed or if it marked to no receive overrides it will be skipped automatically. |
| Resize Filter | Select the filter to use while resizing textures. |
| Texture Encoding | Choose the compression method to use. |
| ASTC Block Type | Available when the texture compression method is set to ASTC; this field will allow you to select the size to use for each compressed blocks. |
| Reduction Quality | Control the compression quality; the higher the better but the slower it will be to compress the textures. |
Once you have set up your publishing options simply click the Publish button; once the operation is terminated you will find a full-fledged project along with the necessary resources to deploy your application on the selected platform.
All you have to do is to open the project file, set the build setting to Release (in the case it is not already selected) and hit the build button et voila!
- Note
- For more information about packaging as well as other generic platform specific info. open the
READMEfile located in your output path.
Debug Publishing
The environment exposed to you by the NRGeditor try to reproduce as much as possible the one available when creating a standalone executable or a add-on (plugin). However in the case that your release .NPK does not behave the way it should try the following.
- Enable back debug mode; inside your project locate the
CtxInitfunction call and add right after the followingDbgInit(<font_size>). By initializing the debug subsystemLuacalls will be protected and errors will be displayed on the console. Based on the way you are compiling the project, you might also have to declare the function:void DbgInit( float font_size );. - If the previous didn't not help you to find the problem, you can always replace the
.NPKby its debug counterpart. From the file menu of the NRGeditor gotoFile > Pack Active Project > <your_targeted_platform>to regenerate it; then replace the.NPKthat is connected to the C/C++ project and run the necessary tests to investigate.
|
|