
The Library helps you to create, find, import and organize your application assets. It allows you to manage all the assets of your application regardless if they are currently loaded or not. Visually the layout of the Library is also similar to the one of the File Explorer; since it technically also manage files and folders. However, it only controls the assets (files) and groups (folders) located inside your current project path. In addition, the Library will give you the opportunity to add assets to your project by creating them manually or by importing them in bulk.
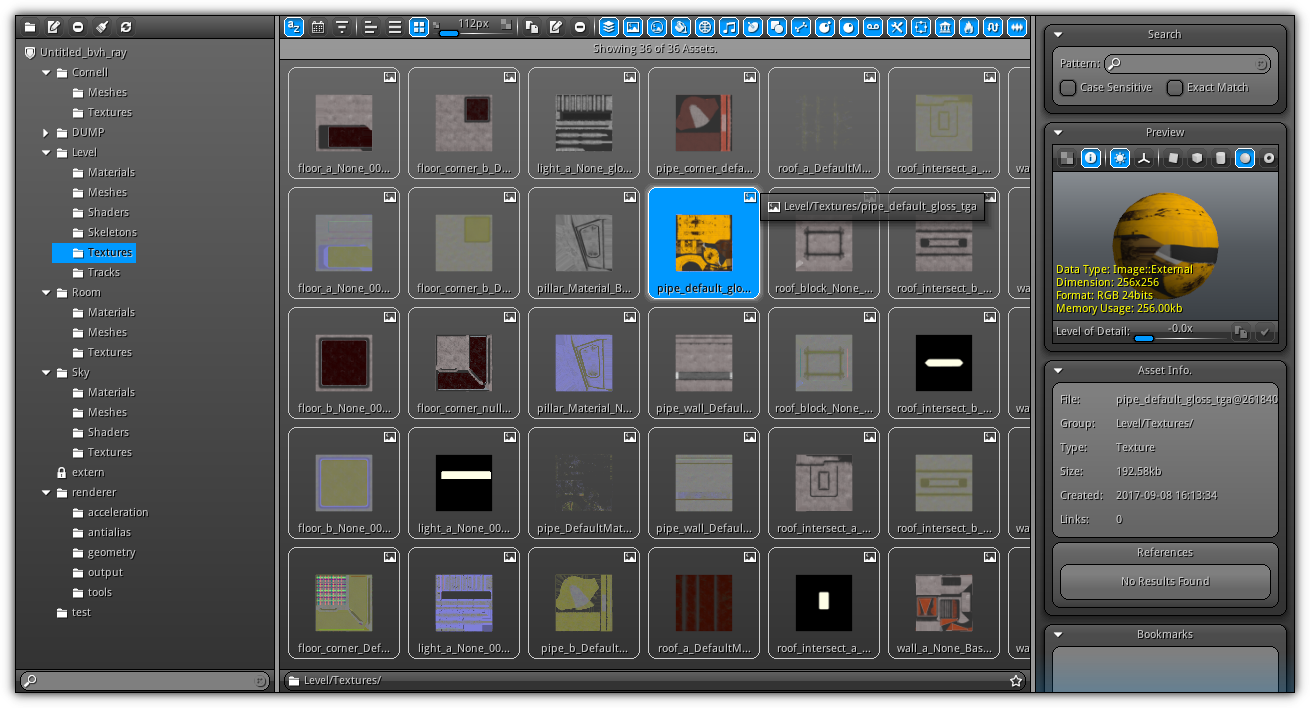
The Library is divided into three sections; the left side gives you the opportunity to visualize your project tree and manage the different asset groups (folders). In this section, you can create, rename, delete and merge them (by drag and dropping the group o another).
At the center of the Library is the content area; this is where all assets contained within the active group selected from the left side tree view will be listed. This area allows you to rename assets and gives you multiple listing and filtering options to efficiently manage all your resources within a specific group.
On the right side is the search where you can query by name or substring to filter the result list at the center of the Library. This area also gives you more information about the active asset selected from the center area and depending on the asset type active give you extra options and functionalities. Also, located within this panel you manage bookmarks to quickly jump to a specific group using a single click/tap.
Menu
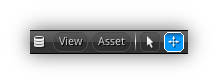
The menu of the Library menu contains only two menu items; the view item control the display mode of the asset list (located in the center area of the Library). The second one is the asset menu; it is using this menu that you can create new asset(s) for your project.
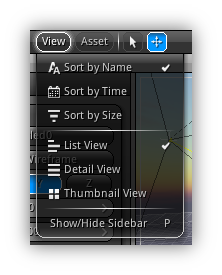
View Menu
| Item | Shortcut | Action |
|---|---|---|
| Sort by Name | Sort the asset list alphabetically (from a to z). | |
| Sort by Time | Sort the list by the asset creation time (newest to oldest). | |
| Sort by Size | Readjust the listing to be sorted by the asset size on disk. Take note that this also take in consideration the asset external data. | |
| Listview | Display the assets ordered as list. | |
| Detail View | Change the display mode of the asset list to show creation time and file size (including external binary data usage). | |
| Thumbnail View | Use thumbnails to preview assets (when available). | |
| Show/Hide Sidebar | P | Toggle On/Off the sidebar (located on the right side). |
Asset Menu
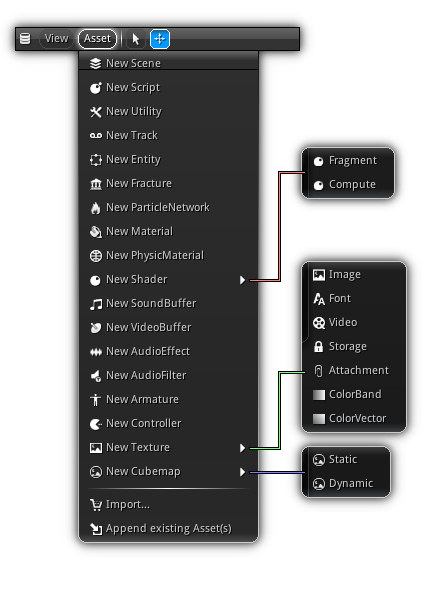
Create an asset(s) manually or in bulk (Import...). Create a new asset simply by clicking on the menu/submenu item corresponding to the type of asset you wish to create. For each entry, a dedicated dialog will guide you through the setup of the basics settings and properties associated with the asset data type; the Asset Name is common to all dialog and represent a unique name to specify the asset.
To quickly place a new asset inside an existing group simply select it from the tree view located on the left side of the Library interface; then select the type of asset you would like to create from the asset menu. The asset group will automatically be filled in the corresponding dialog for the asset; leaving the group blank will place your new asset at the project's root directory.
To create a new group automatically at asset creation time simply type the new path in the asset dialog Asset Group field; you can also use the app. (![]() ) icon to open the file explorer to manually select an existing group within your project path.
) icon to open the file explorer to manually select an existing group within your project path.
For each dialog, once your done press the Create button to confirm the creation of the asset; you can also cancel the operation at anytime by pressing the Cancel button.
- Note
- Groups internal paths are always relative to your project path.
New Scene
A scene can be considered as a level in NRG. It is where you place objects to create your worlds, but it could also be used in another different way such as using it with a 2d camera you can also use them to create GUI, HUD by overlapping them on top of another 3d scene at runtime.
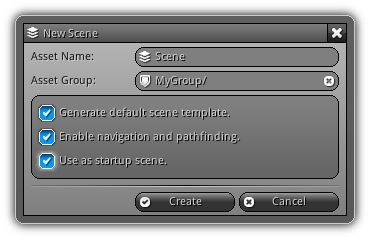
Generate default scene template.: Determine if the default scene template should be created automatically. The default template will create a Render Layer, a Camera, and a Script to set the default graphics states and clear the screen.
Enable navigation and pathfinding.: Activate this option to enable the navigation engine for this scene.
Use as startup scene.: When toggled the new scene will automatically be used as the startup scene which means every time the application starts this scene will be loaded automatically.
New Script
A script is where you place your logic code. NRG is using an event-driven system with built-in functions, that are triggered at runtime based on the on the current state of rendering; a specific action from the user (ie: which rendering states to enable when drawing a material) or internally (ie: a video stop playing or a collision occur).
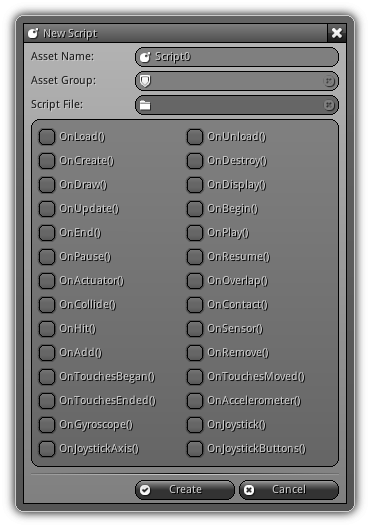
Script File: To select an existing Lua script (.lua) file click on the folder icon (![]() ); this code will be used by your new script; if no script file is specified, a blank script will be generated.
); this code will be used by your new script; if no script file is specified, a blank script will be generated.
Built-in Events: If a blank script is generated you can pre-define builtin functions templates by toggling as many built-in functions you need from the list.
New Utility
A utility is also a script but it is only used by the editor; they do not respond to the default built-in event system like a scripts does; they only respond to the function Register() which is used as their main entry point. They are ideal to create custom importer or any other type of tools that may or may rely on the GUI and IDE modules of the editor. Worth mentionning that they can also be executed automatically when your project is loaded to register plug-ins or other project based dependencies.
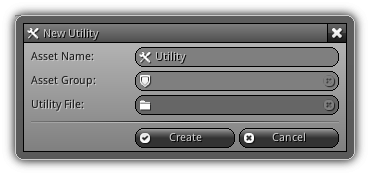
Utility File: Click on the folder (![]() ) icon to select an existing Lua script (.lua) on disk and use its content as the source code of your utility.
) icon to select an existing Lua script (.lua) on disk and use its content as the source code of your utility.
- Warning
- Please take note utility scripts will not be part of the final NRG package generated when you publish your project. Utility scripts are only available within the editor context.
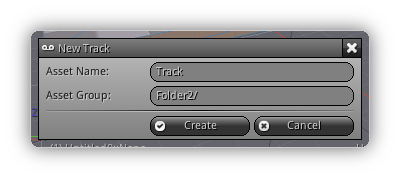
New Track
A track is basically the same as a curve (see Curve) except that they are re-usable by one or multiple assets together. They are generally used by animation(s) and action sequences; in other words, they are curves that are used to control same or similar properties on multiple resources.
New Entity
What would define the best an entity is a prefab object, in other words a fully functional object that is reusable.
Let's take as an example a door called "DoorA". DoorA have a mesh, a material, a physics object and a script that detect if the player is within a certain radius and trigger an animation to open and close (if the player leave that range).
DoorA is a typical example of an object that can be turned into an entity. It can be reused at multiple locations in multiple scenes. To create a new entity all you have to do is to select the functional object you want to turn into an entity, or to use the dialog to manually input it.
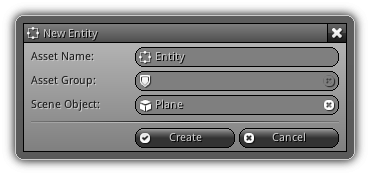
Scene Object: Input an object name manually or click the object icon (![]() ) to popup the object list for the currently active scene allowing you to select an object to convert into an entity.
) to popup the object list for the currently active scene allowing you to select an object to convert into an entity.
New Fracture
A fracture asset defines how an object of the type fractured mesh will be destroyed. It allows you to predefine cuts and fracture patterns, that will in turn "crack" the mesh into pieces that will be converted to shards which at runtime can break under the influence of physics.

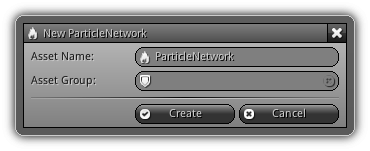
New Particle Network
A particle network assets define how particles contained inside a particle system behave. They can be edited manually or visually using the Molecules Editor. It is used as the base of all particle systems and can be re-used by one or multiple resources simultaneously.
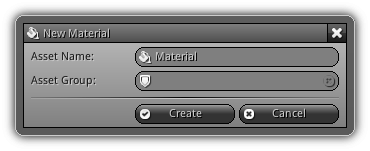
New Material
A material is basically a placeholder for a shader (either fragment or compute), texture samplers and may contain a user-defined variable that is static or mutable at runtime (also worth mentioning that material also can respond to certain events; hence it can also be scripted). Once attached to (ie) a geometry primitive a material will allow you to draw it on screen or to a frame buffer using one or multiple rendering passes.
New PhysicMaterial
A physics material controls the surface properties of a physic object; such as its friction, restitution and combining methods to adopt. For soft bodies, they allow you to control the linear stiffness (in other words the flexibility) of each primitive independently.
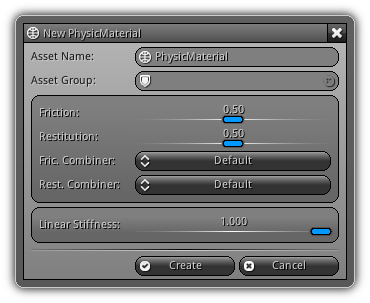
Friction: The Coulomb coefficient of the collider; this property only apply for rigid body physics.
Restitution: Controls the elasticity of the collision; this property only apply for rigid body physics.
Fric. Combiner: Controls the way the friction between two colliders combine. The collider who gets hit first got the priority of choosing which combiner to used. You can select between Default (multiply), Average, Minimum and Maximum.
Rest. Combiner: Controls the way the restitution between two colliders combine. The collider who gets hit first got the priority of choosing which combiner to used. Select between Default (multiply), Average, Minimum and Maximum.
Linear Stiffness: Controls how stiff the faces attached to this physic material for a soft body should be.
New Fragment Shader
A fragment shader contains two distinct blocks of code used for vertex and fragment processing. NRG uses GLSL ES as the default shading language for mobile and desktop; depending on your project profile you can either use OpenGL ES Shading language version v1.0 (GLES 2.0) and v3.0 (GLES v3.0).

Vertex Shader: Specify an existing vertex shader file (.vsh); to select the source file click the folder icon (![]() ) and browse to the current file location.
) and browse to the current file location.
Fragment Shader: Specify an existing fragment shader file (.fsh); to select the source file click the folder icon (![]() ) and browse to the current file location.
) and browse to the current file location.
New Compute Shader
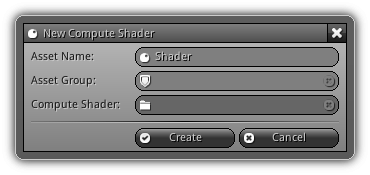
A compute shader runs code executed in parallel on the GPU that accomplishes generic mathematical tasks extremely quickly. The result can be stored directly into a Storage Texture and can be used in your final image composition. Contrarily to a Fragment Shader a compute shader only contains one body of code as it does not have a vertex or fragment processing phase.
Compute Shader: Specify an existing compute shader file (.csh); to select the source file click the folder icon (![]() ) and browse to the current file location.
) and browse to the current file location.
New SoundBuffer
A sound buffer represent the binary data that will be streamed at runtime by a SoundSource. The built-in format supported is OGG Vorbis (.ogg) which provide a competitive and portable high-quality audio with a powerful compression ratio; important as they will be included directly as is into your final NRG package.
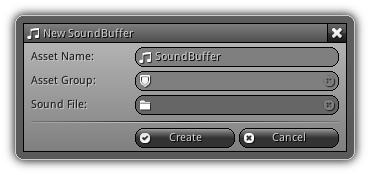
Sound File: Click on the folder icon (![]() ) to open the file explorer and browse to the location of the OGG sound buffer file you would like attach to the asset.
) to open the file explorer and browse to the location of the OGG sound buffer file you would like attach to the asset.
- Note
- If an active scene is currently loaded and you wish to automatically create a new SoundSource (either positional or ambient based on the SoundBuffer specifications channels, mono or stereo) hold
Shiftwhen confirming the asset creation.
New VideoBuffer
Video Buffers are meant to be used in conjunction with a video texture. They provide the necessary video data that will update the dynamic texture at runtime.
- Note
- The built-in format supported by default is the Theora (
.ogv) format.
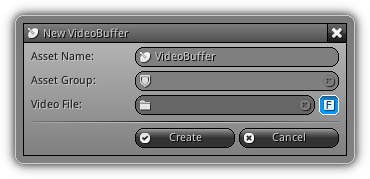
Video File: Click on the folder icon (![]() ) to open the file explorer and browse to the location of the video buffer file you would like to attach to the asset.
) to open the file explorer and browse to the location of the video buffer file you would like to attach to the asset.
In order to speed up seeking video (and preview) selective keyframes samples are decoded and cached; this is, of course, increasing the file size of the video buffer. If you do not require fast video seeking and previewing you can turn off the (![]() ) icon; take note that even turned off seeking will still be possible.
) icon; take note that even turned off seeking will still be possible.
- Warning
- Audio and video are considered two different things; meaning that do not expect a Theora file that contains audio to play it back. The audio tracks inside a video buffer should be extracted and converted to
.oggand added separately using a sound buffer attached to a sound source. Leaving the soundtrack inside an OGV file will only increase the size of the video buffer and the audio data will never be used. Always separate both audio and video before importing.
New AudioEffect
Audio Effects add an extra level of realism to your creations as they can simulate real world acoustic and psychoacoustic effects by modulating the final audio mixer output.
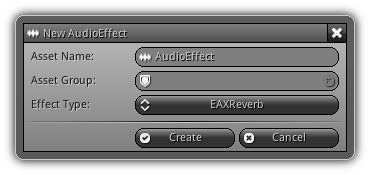
Effect Type: Select the type of effect you would like to create by selecting one from the list. The effect available by default is EAXReverb, Reverb, Autowah, Chorus, Compressor, Distortion, Echo, Equalizer, Flanger, Modulator, LowFrequency and Dialogue. Once created, each type of effect contains a diversity of parameters that can be adjusted manually in the Properties editor.
New AudioFilter
AudioFilter allows you to attenuates various frequencies of a specific sound of the final output of an effect slot in real-time. Select from the Filter Type list to between three built-in types: Low Pass, High Pass, and Band Pass.

Low Pass: Progressively attenuates frequencies above the cutoff frequency. A Low Pass filter is used as an audio crossover to remove higher frequency content from the output signal being sent to (ie) a subwoofer system.High Pass: Does the opposite as theLow Pass; it let through higher frequencies above their cutoff threshold, and progressively attenuates all other frequencies below their cutoff threshold. It is generally used as an audio crossover to remove lower frequencies to a signal being sent to (ie) a tweeter.Band Pass: A BandPass filter allows high and low frequencies between their cutoff threshold to pass and attenuates all others outside of the high/low threshold range. A BandPass is often referred to as a "reject filter" as it only let pass frequencies between their higher and lower cutoff threshold.
New Armature
An armature is used by actions and activity strips etc.. to exclude or include a specific set of bones from an animation. It is connected directly to an existing skeleton and can only be used by animations that are affecting the specific skeleton it is connected with.
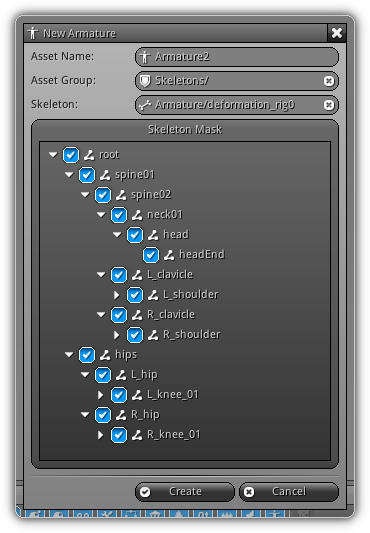
Skeleton: Manually input a skeleton asset name or simply press the ![]() icon to populate the list of all skeletons available in your library; press an entry to select one. To clear the active selection type an empty name or click the
icon to populate the list of all skeletons available in your library; press an entry to select one. To clear the active selection type an empty name or click the ![]() button.
button.
Skeleton Mask: Once a skeleton is selected its entire hierarchy is displayed within this area. Click the checkboxes to either enable or disable a specific set of joints. Use Ctrl+LB to quickly toggle on or off the branches and leaves of a specific root.
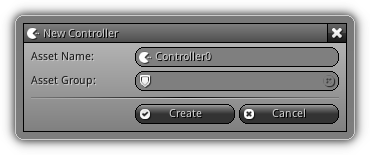
New Controller
Controllers are basically "machine states" that controls the flow of animation. It is used to as an animation controller to is either manipulated by user inputs or by the game logic. It is ideal for NPC and game characters but can also be used manually to trigger another type of machine state processes.
New Image Texture
A texture image is a standard two-dimensional texel buffer populated by commonly used file formats that allow you to use the UVs on a geometry primitive to map their content onto a three-dimensional shape. By default, the editor supports a wide range of lossy, lossless, low and high dynamic range texture formats: JPEG, PNG, TGA, BMP, PSD, GIF, PIC, PPM, PGM, HDR and EXR as well as KTX (for two dimensional ETC2 and ASTC texture) and finally IES lighting data. At the exception of compressed texture data; all imported texels will be converted into bytes that will be directly transferred to the GPU, and consequently drastically improve loading time vs reading/decompression time performances. Optionally during development or at publishing time, non-compressed textures can also be compressed in a GPU friendly compression format (ETC2 or ASTC) actually supported by the platform(s) you are targeting.
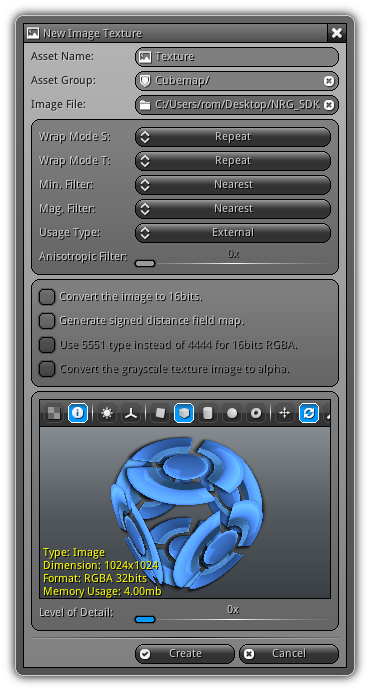
Image File: Click the folder icon (![]() ) to locate the image file you would like to import.
) to locate the image file you would like to import.
Wrap Mode ST: Specify the sampler wrapping mode.
Min. Filter: The minification filter to use for the sampler.
Mag. Filter: The magnification filter to use for the sampler.
Usage Type: Specify the usage type of the texel buffer associated with the texture; select between Static, Dynamic or External. By default the value is set to external which means the data will be treated as a regular sampler2D (loaded once from the disk), however, if the targeted platforms support Texture Buffer Storage (which can lead to drastic performance improvements) and the filters type are either set to nearest or linear; setting the usage to Static or Dynamic will convert the texture to a samplerBuffer2D that is either statically loaded or changes often/every frame (a dynamic sampler buffer).
Anisotropic Filter: If your texture minification filter is above linear mipmaps will be generated automatically; you can then set the level of anisotropic filtering to smooth the lower level mipmaps.
Convert the image to 16 bits.: Save memory by converting them texture to 16 bits (half the memory consumption) but can drastically affect the image quality.
Generate signed distance field map.: Toggle this option when using bitmap fonts or decals. At import time the distance field for the image will be generated automatically; like that you can use them for Alpha-Tested Magnification for Vector Textures and Special Effects.
Use 5551 type instead of 4444 for 16 bits RGBA.: If your texture is an RGBA mask toggle this option. If your texture is a regular RGBA lowering down the alpha bit to 1 will only give you a "binary" like alpha channel; each texel will either be transparent or not, no semi-transparency.
Convert the grayscale texture image to alpha: Only apply for grayscale 8 bits texture; this option allows you to change the default grayscale format from luminance to alpha. If your texture is already alpha mask you should ensure that this option is turned off, but if your texture is (ie) a baked ambient occlusion map this option doesn't apply as it is already probably saved as grayscale.
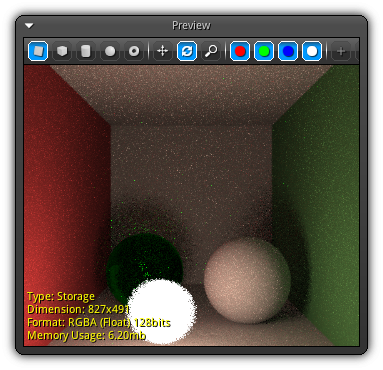
Preview: To learn more about the preview options and controls, please refer to the Preview help and the Texture section of this page.
New Font Texture
A font texture in NRG is basically a texture that allows you to write text on screen. Generated from a Truetype Font file (.ttf and .otf); font textures are built to be assigned on a material attached to a Text object which is used either for 2d or 3d rendering.
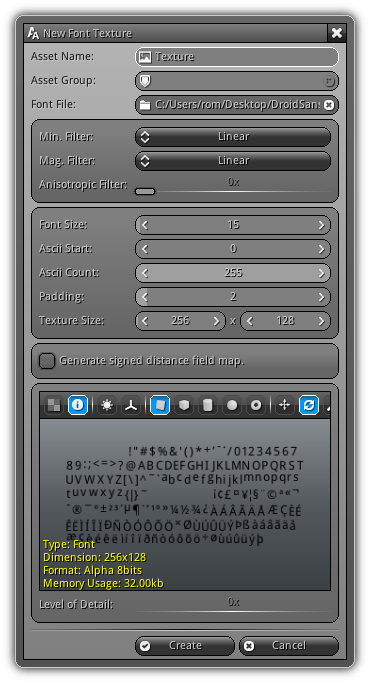
Min. Filter: The minification filter to use for the font texture.
Mag. Filter: The magnification filter to use for the font texture.
Anisotropic Filter: If your texture minification filter is above linear mipmaps will be generated automatically; you can then set the level of anisotropic filtering to smooth the lower level mipmaps.
Font Size: The size of each character in pixels.
Ascii Start: The first ASCII number to use when generating the map.
Ascii Count: How many characters should be generated.
Padding: Number of extra spacing pixels.
Texture Size: Specify the dimension in pixel of the texture map.
Generate signed distance field map: Generate SDF map for the current font; enable if you are planning to use a 3d font with alpha-tested magnification for vector textures.
Preview: For more information about the preview area please refer to the Preview help and the Texture section of this page.
New Video Texture
Video textures are used in conjunction with a New VideoBuffer. Before creating a video texture, make sure that you have a video buffer already created. Each video texture can have their own specific settings that affect the way the video buffer will be streamed as well as the visual quality of the output image.
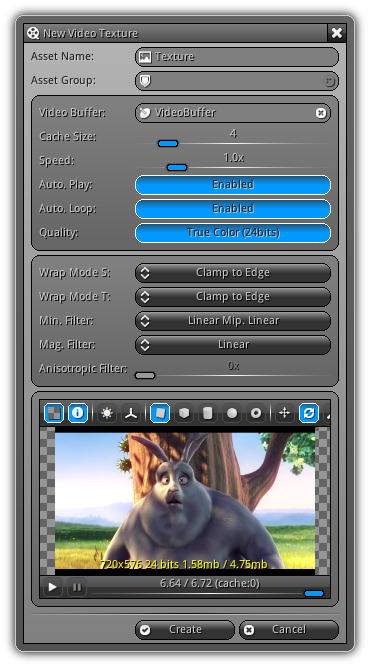
Video Buffer: An existing video buffer.
Cache Size: Amount of frames that should be buffered (pre-render) and cache ahead of time. In case the stream becomes too slow to decompress (mostly caused by fast switching action in the video) theses frames will be used to give more time to the progressive decompression to do its job while still updating the texture.
- Warning
- Assign this value carefully as each frame will be cached in memory so (ie) a video buffer of 720x400 16 bits multiplied by a cache size of 8 will require about 4mb of local memory to pre-cache.
Speed: The speed at which the video buffer should be played back. The higher the value the more CPU/GPU horsepower is required to update and maintain the video texture in sync.
Auto. Play: Controls if the video texture should start playing as soon it is loaded; if not, only the first frame of the video buffer will be used to update the texture at loading time.
Auto. Loop: Determine whether when the video is over it should restart automatically.
Quality: Allows you to set the quality of the image. This option comes in two flavor either high quality which will use the original color of the video buffer or low quality which will cause the YUV values to be converted to 16 bits but uploading the texture to the GPU will require less bandwidth. It's up to you to evaluate which quality option fit the most with the usage of the texture.
Wrap Mode S: Controls whether the texture can be tiled on the X-axis. The default mode is repeated; which allows tiling.
Wrap Mode T: Controls whether the texture can be tiled on the Y-axis. The default mode is repeated; which allows tiling.
Min. Filter: The minification filter to use for the video texture. Please take note enabling mipmapping will cause the full set of mipmaps to be generated for each frame and might cause performance issues depending on the size and quality of the video texture.
Mag. Filter: The magnification filter to use for the video texture.
Anisotropic Filter: If your texture minification filter is above linear mipmaps will be generated automatically; you can then set the level of anisotropic filtering to smooth the lower level mipmaps.
Preview: For more information about the preview area please refer to the Preview help page.
New Storage Texture
A storage texture is a specific type of texture reserved to store the resulting image of a compute shader (see New Compute Shader). The texture generated is an immutable texture (no LODs) specially built to store efficiently texel data written by a compute shader. Once stored, the data/image can be re-used by any of the subsequent rendering stages of your application.
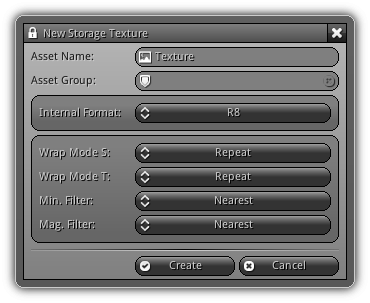
Internal Format: The type of data that will be stored. Multiple options are available to you which guarantee compatibility between GLES and desktop GL (as according to the specs. they originally differ).
Wrap Mode S: Controls whether the texture can be tiled on the X-axis. The default mode is repeated; which allows tiling.
Wrap Mode T: Controls whether the texture can be tiled on the Y-axis. The default mode is repeated; which allows tiling.
Min. Filter: The minification filter to use for the storage texture; limited to nearest or linear due to the immutable nature of the texture storage.
Mag. Filter: The magnification filter to use for the storage texture.
New Attachment Texture
This type of texture is designed to be used by a camera FrameBuffer and represent a frame buffer attachment which can either be color, depth or depth+stencil. The internal format of the attachment will have a direct impact on the type of data the texture will contain. During the render to texture (RTT) process this data will not be written into the screen frame buffer but on a separate in-memory buffer attached to the camera (in other words: off-screen). Once the operation performed all subsequent rendering can have direct access to texture including reading the pixels directly from local memory to either save or custom post-process the texture.
Take note contrarily as the type image an attachment texels cannot be saved on disk as they are strictly contained in GPU memory.
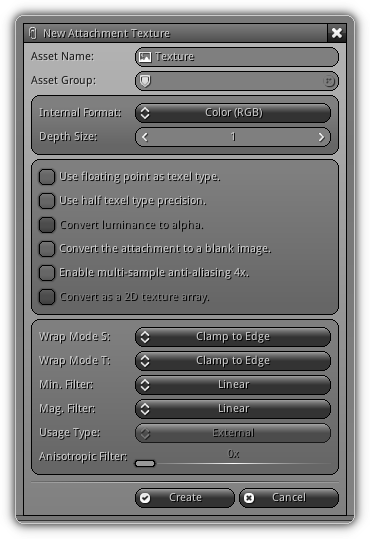
Internal Format: The type of data to be written to the texture during RTT. This option will control what is the internal format of the data contained the frame buffer attachment will contain.
Depth Size: Determine the number of element of a texture array. A value of 1 will consider the attachment to be a sampler2D; a value greater than one will force the attachment to be treated as a texture3D.
Use floating point as texel type.: Use floating points (32 bits) instead of bytes to represent each color component(s).
Use half texel type precision.: Convert the texel data type to 16 bits for either floats or bytes.
Convert luminance to alpha.: If the Internal Format is set to Luminance; convert grayscale to alpha. Instead of storing data into the red channel, data will be stored in the alpha channel.
Enable multi-sample anti-aliasing 4x.: Indicate that the texture attachment should use multi-sampling. This will cause the the texture to be created as a multisample target. Take note that MSAA textures have to be blit to a regular attachment before being usable. To learn how to properly setup multi-sampled texture attachments click here to download the MSAA.zip project sample.
- Note
- 4x MSAA texture attachment functionalities require a project Core Profile compatible with GLES v3.1+.
Convert attachment to a blank image.: Instead of creating an attachment convert the texture type to image allowing you to manually set its texel content and save it on disk. Ideal to use for procedural, color band, curves and/or IES profile textures; where you simply need a texel container.
Convert into a 2d texture array.: If the Depth Size of the attachment if greater than 1 you have the opportunity to convert the default texture3D sampler type into a texture2DArray.
Wrap Mode S: Controls whether the texture can be tiled on the X-axis. The default mode is repeated; which allows tiling.
Wrap Mode T: Controls whether the texture can be tiled on the Y-axis. The default mode is repeated; which allows tiling.
Min. Filter: The minification filter to use for the texture.
Mag. Filter: The magnification filter to use for the attachment texture.
Usage Type: Determine is the attachment is a sampler2D or a samplerBuffer (fore more information see New Image Texture).
Anisotropic Filter: The level of anisotropic filtering that will be applied to mipmaps (if any).
New ColorBand Texture
A color band is a gradient like texture where each color along the band can be specified by the user. They are ideal to create lookup textures (LUT), to create special effects and a lot more.

Interpolation: The interpolation strategy that will be used to interpolate from one color key to another.
Wrap Mode S: Controls whether the texture can be tiled on the X-axis. The default mode is repeated; which allows tiling.
Wrap Mode T: Controls whether the texture can be tiled on the Y-axis. The default mode is repeated; which allows tiling.
Min. Filter: The minification filter to use for the texture.
Mag. Filter: The magnification filter to use for the attachment texture.
Anisotropic Filter: Controls the anisotropic filtering level of the texture; only available when mipmapping is enabled.
New ColorVector Texture
A color vector texture is a unique type of LUT where each color component can be controlled independently by a curve. The resulting texture can then be used for color grading, color correction or to create other types of special effects.
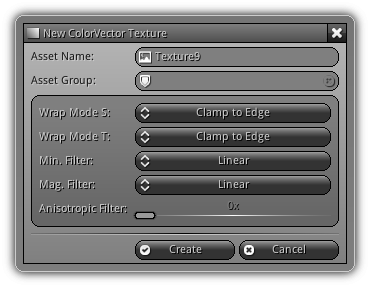
Wrap Mode S: Controls whether the texture can be tiled on the X-axis. The default mode is repeated; which allows tiling.
Wrap Mode T: Controls whether the texture can be tiled on the Y-axis. The default mode is repeated; which allows tiling.
Min. Filter: The minification filter to use for the texture.
Mag. Filter: The magnification filter to use for the attachment texture.
Anisotropic Filter: Controls the anisotropic filtering level of the texture; only available when mipmapping is enabled.
New Static Cubemap
A cube map is a set of six separate square textures that allow you to represent the reflections on an object from its environment. Each face of the square form a hypothetical cube that surrounds an object each face represents the view along the normal direction of its faces: left, right, front, back, top and bottom. You can either use an existing texture or bake them at runtime using a frame buffer. Positive X: The texture to use on the right side of the box. To select an existing texture you can either type its asset name in the edit box and press enter to confirm. Or you can popup the image list by clicking the texture icon (![]() ) and select an entry from the list.
) and select an entry from the list.
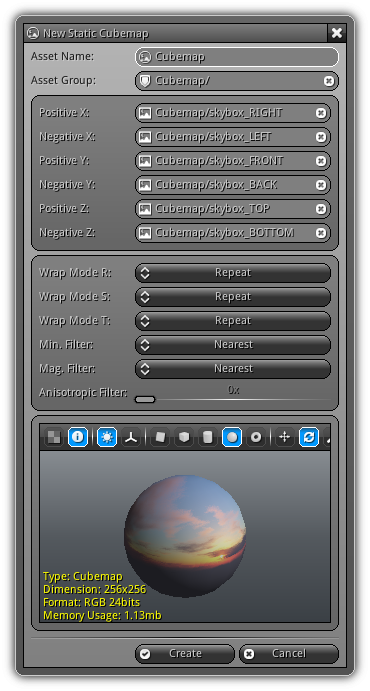
Negative X: The texture to use on the left side of the box.
Positive Y: The front face texture.
Negative Y: The back face texture.
Positive Z: The texture located at the top of the cube.
Negative Z: The texture to use at the bottom of the cube.
Wrap Mode R: Controls whether the texture can be tiled on the Z axis. The default mode is repeated; which allows tiling.
Wrap Mode S: Controls whether the texture can be tiled on the X-axis. The default mode is repeated; which allows tiling.
Wrap Mode T: Controls whether the texture can be tiled on the Y-axis. The default mode is repeated; which allows tiling.
Min. Filter: The minification filter to use for the cube map.
Mag. Filter: The magnification filter to use for the cube map.
Anisotropic Filter: If your cube map minification filter is above linear it means you are generating mipmaps; you can then set the level of anisotropic filtering to smooth the lower level mipmaps.
Preview: For more information about the preview area please refer to the Preview help page and the Texture section of this page.
- Note
- You can apply any type of texture; either image, attachment and videos etc... (font textures also apply; but doesn't make much sense here). All textures need to be square and have the same dimension and format.
New Dynamic Cubemap
A dynamic cube map is used in conjunction with a probe object; it allows you to render all six faces of the cube map dynamically using the drawing sequence that you specify. It is used as a render to texture target that can subsequently be used by your drawing and other compositing processes.
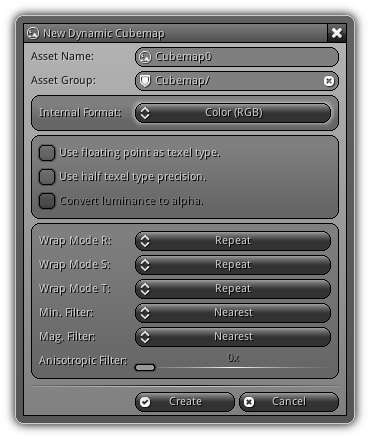
Internal Format: The data type to be written to the cube map during RTT. This option will control what is the internal format of each face texture.
Use floating point as texel type.: Use floating points (32 bits) instead of bytes to represent each color component(s).
Use half texel type precision.: Convert the texel data type to 16 bits for either floats or bytes.
Convert luminance to alpha.: If the Internal Format is set to Luminance; convert grayscale to alpha. Instead of storing that data into the Red channel, data will be stored in the Alpha channel.
Wrap Mode R: Controls whether the texture can be tiled on the Z axis. The default mode is repeated; which allows tiling.
Wrap Mode S: Controls whether the texture can be tiled on the X-axis. The default mode is repeated; which allows tiling.
Wrap Mode T: Controls whether the texture can be tiled on the Y-axis. The default mode is repeated; which allows tiling.
Min. Filter: The minification filter to use for the cube map.
Mag. Filter: The magnification filter to use for the cube map.
Anisotropic Filter: If your cube map minification filter is above linear it means you are generating mipmaps; you can then set the level of anisotropic filtering to smooth the lower level mipmaps.
Import...
Clicking the Import... item will cause the File Explorer to open in file selection mode you can then select one or multiple files from all the various built-in supported file formats mentioned previously in this document. Depending on your selection the appropriate asset dialogs) will pop up in sequence allowing you to place and import each asset individually.
In addition, you can also import your 3d models created in a modeling software by exporting them to COLLADA (recommended v1.4.1) for more information, please refer to the COLLADA.
Append existing Asset(s)
At the bottom of the Asset menu you will find the option to import existing asset(s) coming from another NRG project. By clicking the Append existing Asset(s) item the File Explorer will popup prompting you to select the asset data file(s) you want to append to the current project. Once you confirm your selection theses assets along with their external data files (if any) will be placed under the current selected directory of the library.
- Warning
- Pre-compiled assets cannot be imported since their internal content is in binary form and read-only; as a result their internals (name, id, data) cannot be modified.
Others
On top of the list of the asset that can be created manually, there are still two types of assets that cannot. The two remaining types of an asset can only be imported into the editor coming from a COLLADA file.
Skeleton: They represent the armature attach to a mesh and allow deformation of the mesh using actions and sequences; skeletons are therefore created using a 3d modeling software and imported.
Path: A path allows you to force an object to follow a predefined curve made out of control points. You can use them to (ie) predefined camera paths, control an NPC and a lot more.
Batch Import
Most of the assets can also be imported in batch when dragged over a library area. To batch import assets of a specific type press the ![]() icon located at the top right of its respective dialog.
icon located at the top right of its respective dialog.

Next time the asset type that have been tagged for batch import appear in the batch list the same settings as the first of its kind will be used.
Actions
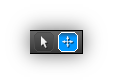
Change the default behavior of the Left Button (or single touch) while clicking on an empty space inside the file list area. Take note regardless of the current control mode single selection is always available when clicking on an asset by selecting it with the Left Button (or single tap). Clicking or tapping on an asset while holding Shift will select or deselect it.
| Icon | Mode | Description |
|---|---|---|

| Selection | The fastest way to select (or deselect) multiple files entry (when in apply) in one action is to use the rectangular selection. Start by clicking where you want the rectangular selection to start and drag the cursor where you want the rectangle to end; then release to multi-select. To append or deselect a selected file hold Shift. |

| Pan | Click and drag on an empty space inside the file list then drag. |
Asset Browser
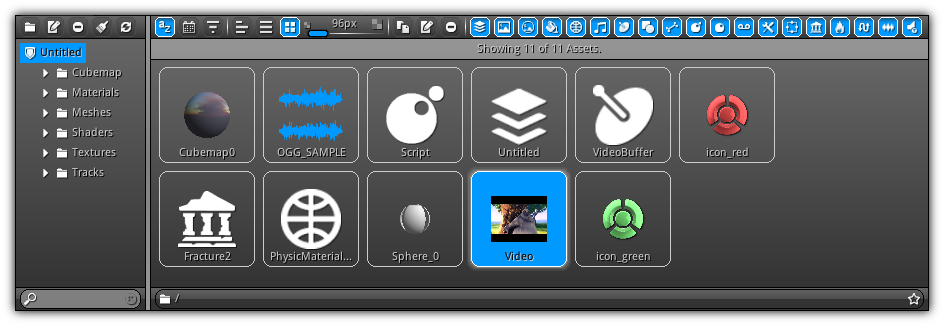
The center area of the Library editor is dedicated strictly to group management; it is built exactly like a conventional file browser where the left side present a tree view that contains all the asset group currently existing in your project. The the right side is where the assets contain in the active group from the tree view are displayed.
Asset Groups
Manage the asset groups available in your project.
- Activate: Simply click or tap on the tree view item to change the active group.
- Expand: Click or tap on the arrow next to the group's name. This will force all the subgroups contained in the selected group to expand. Repeat the operation for each subgroup(s) available.
- Merge: To merge a group or subgroups first select the entry that you would like to merge (by clicking or tapping on it) then drag it over to the the existing group where you would like to place it.
Toolbar
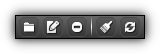
Quick buttons to perform common asset group operations.
| Icon | Action | Shortcut | Description |
|---|---|---|---|

| New Group | Left Button x 2 | Double click/tap to create new group using the active group as root. |

| Rename | Enter | Rename the active asset group. |

| Remove | Delete | Remove the selected asset group and all its sub group(s). All assets contained within the group architecture must not be linked to any resources for the operation to be successfull. |

| Clean | Ctrl+L | Force a full cleanup of the Library; this action will unload from memory all assets that does not have any links and force the VM to run the garbage collector. In other words this action keep your application memory nice and tidy; Tap this button every once in a while working to keep things clean! |

| Reload | Click this button to reload the active project. If you are an expert use and you manually append existing assets from another NRG project or rename an asset manually using an external file browser/text editor. This action will reload the current Library and fix all asset names and paths. In other words, this will fix all the broken links that might exist inside your project Library. Take note this action can only be executed locally on a non pre-compiled and non read-only project.
|
Search
Quick (and dirty) case-insensitive asset group search. Simply type in a word or keyword and the asset group list will hide everything that does not match the pattern that you input.
Special Groups
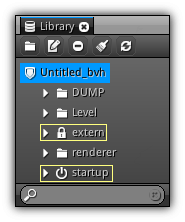
The is no restriction in terms of names that can be used for groups. However, there is two names that are reserved by the system. Notice in the screenshot above the extern and startup directory icons that are different from the regular group one. Theses two directory serves different purposes:
| Name | Description |
|---|---|
extern | Contain all the external files added manually by the user to the library. It can be plugins, configuration files or whatever type of file you may need for your application or on a per platform basis. Fore more information visit External Files. |
startup | As its name imply it is used to store files including utility script that will automatically run as soon your project is loaded/reloaded in the editor. You can either place them manually or automatically (see: Code Editor Toolbar). |
Asset List
Manage the assets available in the currently active asset group location.
- Selection: Simply click or tap on the asset item you want to select to activate it. You can expand the current selection by holding the
Shiftand tap on more entry. To deselect a selected entry holdShiftand tap it again. - Move: To move one or multiple assets to another existing group select them using the method above and simply drag the selection to the asset group where you want them to be placed.
Edit Menu
The following commands are available from the Edit item available from the main menu:
(De)select All: Select/deselect all assets currently visible in the asset list.Invert: Invert the current selection.Delete: Delete the current selection.
Toolbar

Common operations available when manipulation assets within the asset browser. Using this toolbar you can control the visual appearance and sorting of the asset list and quickly filter the type of asset you wish to be displayed.
Display Modes and Sorting
| Icon | Description |
|---|---|

| Order the asset list alphabetically. |

| Sort the listing by the asset creation date and time. |

| Sort the asset list by size (including external data file size, if any). |

| List view display mode. |

| Details view display mode. |
| Icon view display mode. Once this mode is activated, the slider located on the right side of the control will become enabled. This slider allows you to change the size of the thumbnails. |
Operations
| Icon | Action | Shortcut | Description |
|---|---|---|---|

| Duplicate | Shift+D | Duplicate the current asset selection. |
|
| Rename | Enter | Rename the selected asset. |
|
| Remove | Delete | Delete the current asset selection. Before deleting assets, make sure that they are not used by any other resource. In addition, the Library editor expect you to know what you are doing deleting asset(s) is undoable. |
Filtering
| Icon | Description |
|---|---|

| Enable or disable displaying the scene assets. |

| Include or exclude all texture types to be displayed. |

| Controls whether to display cubemap assets. |

| Show/hide all materials from the asset list. |

| Enable or disable the listing of all physic materials. |

| Controls whether to display sound buffer assets. |

| Enable or disable the listing of all video buffers. |

| Display or not all the mesh in the asset list. |

| Include or exclude all skeleton assets to be displayed. |

| Show/hide all scripts from the asset list. |

| Controls whether to display shaders asset. |

| Enable or disable displaying the track assets. |

| Include or exclude all utility scripts to be displayed. |

| Controls if the entity asset(s) should be displayed in the asset browser. |

| Toggle the visibility of fracture assets. |

| Show/Hide all particle network assets. |

| Determine if path assets data type should be displayed. |

| Controls the visibility of audio effect assets. |

| Allow audio filter assets to be displayed inside the asset browser list. |

| Filter wether or not armatures should be included in the asset list. |

| Display or not the existing controllers from the asset list. |
Available when the active selection contains uncompressed textures. Clicking this button will open up the Texture Compressor. The compressor is a tool that compress texture in either ETC2 and ASTC format and store them internally as a KTX file. |
- Note
- Hold
Shiftwhile clicking on an asset icon to invert the current selection state of the other assets. To copy the current state of an asset filter; simply holdShift+Alt.
- Remarks
- Texture compression is available when your target project is at least targeting OpenGL ES 3.0 and up.
Location Bar
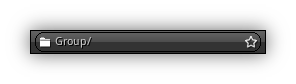
Located at the bottom of the asset browser you can find the location bar. It allows you to visualize the relative path of the currently active group; to bookmark the active location tap on the star icon (![]() ). If the location starred does not already exist in your current Bookmarks list it will be added so you can quickly jump to its location using a single click.
). If the location starred does not already exist in your current Bookmarks list it will be added so you can quickly jump to its location using a single click.
Viewport Integration
When certain asset type is selected you can directly drag and drop them to the View3d. This operation work only if at least one of the View3d viewport is in edit mode (meaning that the viewport is drawing a certain render layer). In edit mode, the viewport will respond to drag and drop operation coming from the Library editor. To drag an asset first select it with the Left Button (or a single touch) then drag it over to the viewport where you would like to perform one of the operations listed below using the asset type that you are currently dragging.
By default, only visible mesh objects will be tested to check if they intersect with the drop point. However, you can restrict the drop operation to be applied to all object types not only the ones that contain geometry by holding the A key; and to cull back faces on triangles hold C.
- Mesh: Drag and drop a mesh asset and drop it on a viewport to create a new static mesh object at the location of the scene 3d cursor (if the scene does not use the 3d cursor and/or snap target the object will be placed at 0,0,0).
If a mesh without LOD is dropped onto a viewport a static mesh is created. By default the render layer mask of the object will be set to the active layer the mesh is dropped on; however to use the active scene render layer mask instead of holding the Shift key.
- Material: Drag and drop the material on either a text object or on a face of geometry to automatically assign the material to an object or on the primitive underlying under your pointing device.
- Texture: Drag and drop a texture on a text object (font texture only) or on the face of an existing mesh that already has a material assigned. To directly assign the texture to an existing sampler slot hold the associated channel index number (key from
1to9) that you want the texture to be assigned to. - Cubemap: Drag and drop a cube map on a face that has a material assigned. Hold a key from
1to6to assign the cube map to the sampler index represented by the key. - Script: Drag a script over an existing geometry object and drop it. This will automatically create a new scripting thread and assign the selected script. Hold a key from
1to9is pressed the drop operation will update the script of the thread index by the key. - SoundBuffer: Drag and drop the sound buffer on a sound source to automatically assign that buffer to the source.
- Entity: Run the entity script dropped on the 3d viewport and append the entity to the active scene. Placement for entities works the same as for meshes.
- Fracture: Drag a fracture asset over a 3d viewport to automatically create a fracturedmesh.
- Scene: Load (or reload) the scene and set it to be the active scene used by the editor.
Properties Integration
At any time you can also drag and drop an asset to a widget that requires the same data type as your selection. For example, you can drag and drop a script to control that requires a script asset input; the same applies to all type of control where a specific asset data type is needed. As a rule of thumb a text box of the type alphanumeric (same type as the Asset Name input field in the new asset dialog).
Desktop Integration
When a Library editor is selected you can also perform drag and drop operation between your current platform (desktop version only) default file browser and your Library. You can either import a single asset; or batch import multiple assets. For each file extension Library, the associated resource import dialog will appear in sequence using your file selection. To cancel the import process simply click the Cancel button or close the dialog form.
- Note
- Quick import functionalities are only available on the desktop version of the editor; it does not work on mobile devices since not all mobile OS comes with a default file browser.
Tools
Located on the right side of the Asset Browser you can find the dedicated area reserved for common asset tools. Depending on the active selection or the current state of the library this area will contain multi-purpose tools.
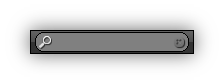
Search
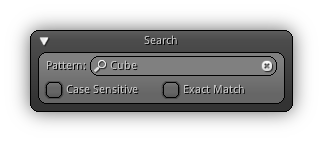
The search tools let you quickly filter the current assets displayed using the active group using a specific or substring pattern. To filter, edit the pattern box then press Enter or the find icon (![]() ) to confirm.
) to confirm.
Pattern: Enter the pattern you want to used to search the asset list that depend on a specific string or substring that will be evaluated against the asset name.
Case-Sensitive: By default the search is case-insensitive; when toggled the search will be case-sensitive; if not either lowercase and uppercase doesn't make any difference; hence case-insensitive results will be displayed.
Exact Match: Require an exact string match (On/Off); enable or disable the substring search functionality.
Preview
 |
 |
 |
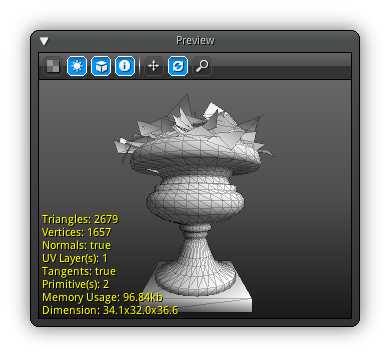
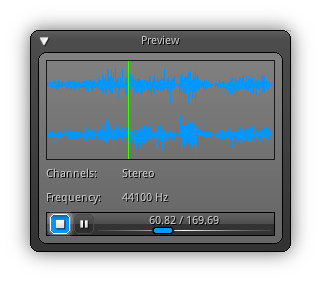
The preview box comes in multiple flavors; and will appear when a single asset that can be reviewed is selected. The type of assets that can appear in the viewer are Textures (all types), Cubemaps, Video Buffers, Sound Buffers, Scripts, Shaders, Skeletons, and Meshes of all types. For more information about how to operate this area please refer to the Preview help page.
Geometry
The following sections apply only when an asset that contains geometry is selected.
Level of Detail
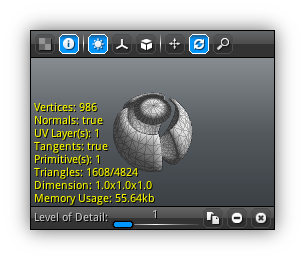
Once a mesh is selected, the preview area will be available in the tool area. On top of acting as a live preview to inspect your geometry and its LODs (by dragging the slider); you can also use this interface to extract a specific LOD and create a new mesh, remove a specific LOD or clear all the LOD(s) below a specific level.
| Icon | Description |
|---|---|
|
| Isolate a specific LOD and create an independent mesh into the same asset group where the base mesh is located. |
|
| Remove the current level of details from the mesh geometry database. |

| Clear all the LOD below the current level selected. |
Reduction
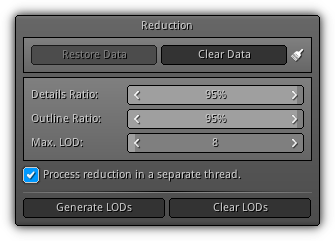
This tool allows you to automatically generate offline or runtime level of details for a mesh. The process is completely automatic and allow you to drastically reduce the amount of triangles draw on the screen. In addition the process generate an acceleration structure that can be reused by the painting tools and at runtime.
Build/Restore Data: Either build or reload from disk the reduction data.
Clear Data: Flush the active reduction data associated to a mesh. If you want to also remove the data store on disk press the ![]() button.
button.
Details Ratio: The amount of details to preserve at runtime or when switching pre-generated LODs.
Outline Ratio: Factor either used when generating offline LOD or while adjusting the topology at runtime for the active mesh.
Max. LOD: Maximum amount of LOD to generate offline and to store along the base mesh.
Process reduction in a separate thread.: Optionally use an external thread to generate the offline level of details.
Generate LODs: Create offline level of details for the active mesh based on the Max. LOD parameter.
Clear LODs: Remove all existing LODs associated to the active mesh.
Texture
The following sections apply only when a texture is selected. Depending on its data type the tools displayed will automatically adjust itself.
Level of Detail
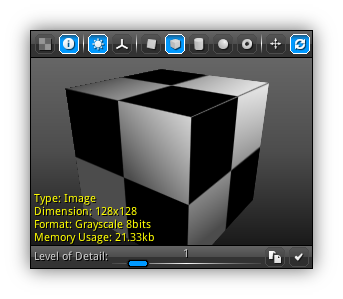
When a texture is actively selected, within the asset list the texture preview will appear in the tool area. You can then use the slider at the bottom of the preview to select which level of detail (or mipmap level if you prefer) should be displayed. Dragging the slider all the way left (displaying a negative value) represent that the full mipmap pyramid will be used by the preview.
Once a specific level of detail is selected; you can either choose to create a new texture asset using the current LOD; or you can resize the current texture to permanently use the active mipmap level.
| Icon | Description |
|---|---|
|
| Isolate a specific mipmap level and create a new independent texture using the LOD width and height. |

| Resize the current texture to the selected level of detail. Please take note this action is undoable. |
- Remarks
- When displaying a specific level of details the Memory Usage will display the size of the active mipmap; else the full mipmap pyramid total size will be displayed.
- Warning
- If the texture that you are resizing is linked to a cube map resizing it will force this cube map to become invalid since the operation will break the cube map requirement to have all textures the same width and height (assuming that the texture is not used on all the faces of the cube map).
Color Band
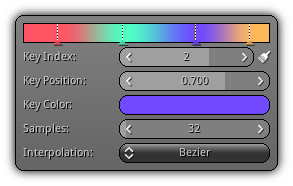
When a ColorBand texture type is viewed, this section of the preview will become available. Using this control you can edit the color band; refer to the table below to learn how to operate the color ramp control.
| Shortcut | Description |
|---|---|
Left Button | Select an existing color key. |
Left Button 2x | Add a new color key at the cursor location. |
Left Button+Drag | Move the position of the active color key along the color ramp. |
Del | Remove the active color key. |
Backspace | Clear the color band by removing all color key(s). |
Key Index: The index of the selected/active color key. To clear all color keys from the ramp press the ![]() icon.
icon.
Key Position: The active color key position within the color ramp (0 to 1).
Key Color: The select key color; press the color bar to pop up the Color Picker.
Samples: Controls how many samples should be evaluated to create the color band texture.
Interpolation: The interpolation type to use when sampling from one color key to another. For more information about each type please refer to the Interpolation help section.
Color Curves
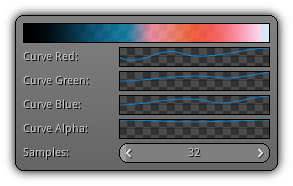
This section is available only when a texture of the type ColorVector is selected. The color curves control allow you to edit this type of texture with ease. To edit a curve for a specific color component simply click the curve bar that will in turn pop up the Curve Picker.
Red, Green, Blue, Alpha: Press the curve bar to edit the active curve for the active color component.
Samples: Work the same as for color bands; this value controls how many samples should be evaluated to create the texture.
Track
Track within previewed inside the library can be edited by clicking on the curve area; this action will open up the Curve Picker. If the track is not used by other resources, ensure that you save the changes before switching to another asset.
Texture
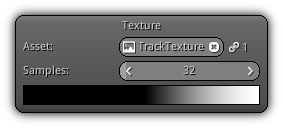
This tool allows you to convert the track curve output directly to a texture. The texture type can either be Image or Attachment; take note a texel data of an attachment cannot be saved on disk.
Asset: The texture asset to use as a destination to convert the track's curve. Tap the ![]() icon to populate the texture asset list. Select one from the pop-up or simply type in the texture asset name to link it to the track. To remove the link press the
icon to populate the texture asset list. Select one from the pop-up or simply type in the texture asset name to link it to the track. To remove the link press the ![]() icon or validate an empty asset name.
icon or validate an empty asset name.
Samples: Controls how many values will be evaluated along the track's curve and redirected to its associated texture.
The color bar located at the bottom of the tool is a representation of the gradient evaluated when converting the curve to a texture.
Bookmarks
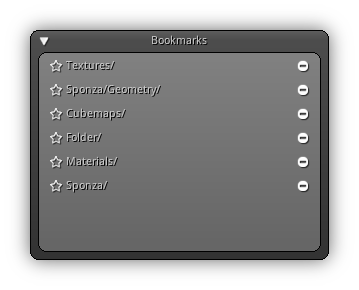
The Library bookmark system is the same used by the File Explorer except that they belong to the current project you are working on and are all relative to your project path. To quickly jump to an existing asset group by the first mark, it then simply click or tap on it; to remove an existing bookmark from the list click the remove icon (![]() ).
).
Asset Info.
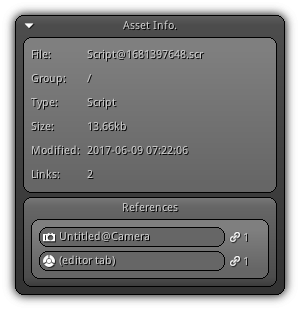
Available for all type of asset; the top section display general information about the asset file and links. The bottom section displays all the resources currently linked to that asset. Assets that are linked to one or more resource cannot be removed as long as this "link" exists. Remove all links and close all tabs (including for scripts, utilities, and shaders) that use the asset before removing it.
- Note
- Take note only the active resource(s) that are using the asset will be displayed; meaning that a resource not currently active; or loaded if you prefer, will not appear in the list. If you delete an asset linked to a non-active resource, the next time the resource will be loaded the asset will not be available. Keep that in mind before deleting assets and make sure that they are not connected to any online and/or offline resource(s).
File Sync.
When importing image textures, scripts, utilities or shaders loaded from disk a link to the original source will be saved inside your project (.sync file). This allows you to directly edit ie. textures and the other type of assets mentioned above using any editor that you like.
As soon as the source file is saved the editor will automatically update the asset connected to the resource and update it in realtime (NRGclient included). All file paths that are in sync with your project are stored as relative paths which allows you to migrate your project to another machine without losing you source file links (assuming that the file/folder architecture is also restored on the other machine).
- Warning
- If you are moving or deleting the source file the editor will not be able to sync it and the link will be deleted at the next time the
.syncfile gets saved. If the path must be changed; you can manually edit the.syncfile with a text editor.
|
|