
Materials are what brings your scene to life; they are the graphics engine how to draw your triangles on the screen. Materials consist of a Shader which can be of the type Vertex/Fragment or Compute. Scripts can also be attached; which allows you to tell the system what to enable (or disable) before drawing the material (ie. blending), set shader variables and more. Textures (called samplers in the context of material) which allow you to map their texels using the UVs of your geometry to triangles.
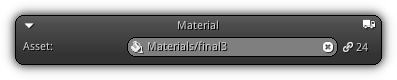
Asset: The active material ready for editing. If no material have been manually specified by the user; the active material displayed will be the one of the primitive that you have selected within the View3d. To cancel your selection and fallback to the default selection press the ![]() icon once; press again to clear the default selection.
icon once; press again to clear the default selection.
The ![]() icon located at the top right of the slot box indicate if the material selection is currently set to automatic or manual.
icon located at the top right of the slot box indicate if the material selection is currently set to automatic or manual.
Scripts
The Scripts section allow you to create threads and connect a script asset to each of them. Using this mechanism you can specify what the system should executing before or after drawing the active material. The table below list all the events that a base Material can trigger, extra events can also be included ie. if a video texture is attached (more info. later on this page):
| Callback | Description |
|---|---|
OnDraw() | Triggered right before the material is about to draw the triangles on screen. It is at this point in the pipeline process that you should setup the require graphic state(s) that your material will be using; setup user specific shader and/or user variables right before drawing. |
OnPaint() | Occur right after the material is done drawing triangles. In this callback you will typically disable the graphic state(s) that you have enabled in OnDraw() if you do not need them anymore. |
Shader
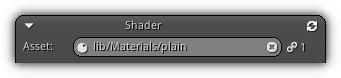
This section of the material properties is dedicated to shader. A shader is a microprogram that will be running on your GPU that will tell to each pixel how to be drawn on the screen. There are two types of shader that can be connected to material either Fragment which consists of a vertex and a fragment shader and Compute which allows you to effectuate general computing operations and store the result into Storage texture(s).
To connect a shader to the active material selected either type in the name of the asset or press the ![]() icon to list all available shaders. Located on the right side of the control the
icon to list all available shaders. Located on the right side of the control the ![]() icon represent the number of active connections the shader currently have.
icon represent the number of active connections the shader currently have.
- Note
- At the top right corner the
 icon allows you to transfer the active uniform variables of the shader to the current object selection. For each uniform a new member variable will be created for each object (if it does not exists already or if the variable type is different).
Storage
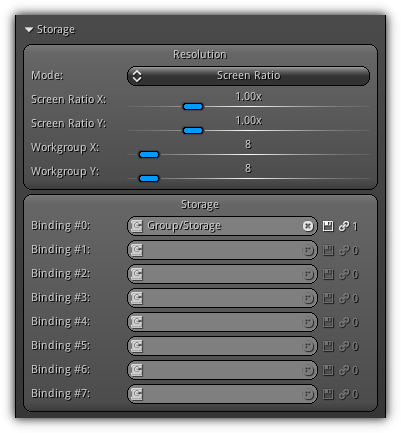
This section is available only if a Shader of the type compute is connected to the material. You can set various settings including the size of the storage(s) and the workgroups that will be operating your program on the GPU.
Resolution
Mode: Select between Screen Ratio or Fixed Size. If screen ratio is selected the size of the storage will be relative to the viewport dimensions. In the case of fixed ratio; the size is represented as absolute texel values.
Ratio/Size XY: Depending on the Mode selected either provide the size of the storage as a ratio or an absolute value.
Workgroup XY: Specify the size of the dispatch groups.
Bindings
Binding: Specify each storage texture (up to 8 bindings) that will be used by the compute shader to store its result(s). Bindings basically work in the same as frame buffers Attachments; each unit can be set independently inside your compute shader to store a specific set of data. By default all storage binding are write-only; meaning that the result is stored internally.
If you wish to get access to the resulting buffer data press the
![]() icon located on the right side of the binding entry. Enabling this option will tell the system to actually transfer the data from the GPU back to the CPU.
icon located on the right side of the binding entry. Enabling this option will tell the system to actually transfer the data from the GPU back to the CPU.
Once transferred you can have access to it via scripting using the byte_array or float_array properties of the texture Texmap structure. If you are using C/C++ you can access it using the Texmap generic texel_array field (typecasting might be required based on the data type you wish to retrieve).
On the far right the ![]() icon display the number of connection the storage texture currently have.
icon display the number of connection the storage texture currently have.
Samplers
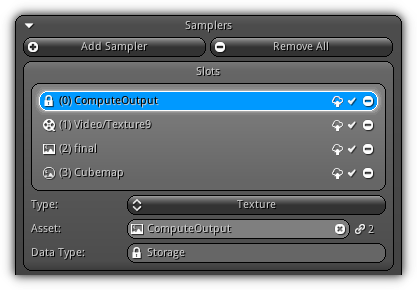
Samplers are textures that will be automatically attached when your shader is executed. At shader executing time their texel (or data) content will be accessible by your shader. All texture types and cube map are supported and can be attached freely to your shader.
Add Sampler: Create a new texture slot entry.
Remove All: Clear all existing texture slot(s).
Slots
Active a working slot by selecting it from the sampler list. Once activated, the properties interface (located by default below the texture slot box) will be automatically updated based on your selection.
To remove a specific slot press the ![]() icon located on the far right side of the slot. You can also control the availability (enable/disable) of a specific slot by toggling the
icon located on the far right side of the slot. You can also control the availability (enable/disable) of a specific slot by toggling the ![]() button. To enable or disable texture overrides such as resizing or compression (usually triggered by the publishing process) press the
button. To enable or disable texture overrides such as resizing or compression (usually triggered by the publishing process) press the ![]() button.
button.
Type: Select the type of sampler that should be connected to the active slot. Choose between Texture or Cubemap; consequently the Asset field below will display the list of the selected type.
Asset: With the type selected press the ![]() or
or ![]() icon to display the list of the selected asset type. To remove the active slot connection to an asset press the
icon to display the list of the selected asset type. To remove the active slot connection to an asset press the ![]() button. The value near the
button. The value near the ![]() icon represent active connection(s) the asset currently have.
icon represent active connection(s) the asset currently have.
Data Type: For reference only; this field displays the active data type of the texture or cube map actively set for the selected slot.
Video
The following set of properties are available when a sampler of the type of video is selected.
Scripts
The video Scripts section allow you to set script(s) that will respond to the set of callbacks a video texture is providing. Please refer to the table below to learn about the events a video texture is providing.
| Callback | Description |
|---|---|
OnPlay() | Occurs when the video starts playing. |
OnResume() | Triggered when the video was paused then starts playing back again. |
OnPause() | Triggered every time the video pause. |
OnStop() | Occurs when the video stop playing. Take note the video is set to Auto. Loop looping does not trigger a stop event. |
- Remarks
- Notice the video texture itself contain a handler that allows you to set scripts. Callbacks provided by videos are not handled by the material handler itself. The reason is that a video texture can be reused by multiple materials; so the script section have to be common to all.
Settings
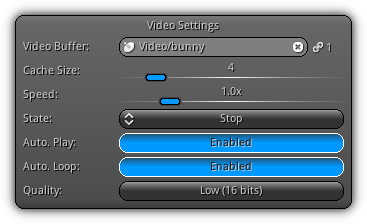
For your convenience when a video is selected the following properties allow you to change the default settings that you have previously set in the New Video Texture dialog; please refer to this help section for more information about the available settings.
Cubemap
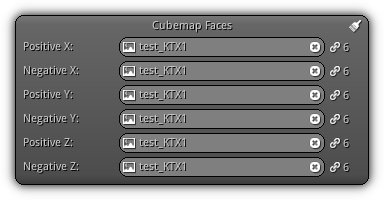
This section is available when a Cubemap texture slot type is selected. The settings below allow you to change each faces texture in a similar fashion as you previously did in New Static Cubemap dialog. To clear all faces and restart anew press the ![]() icon.
icon.
Settings
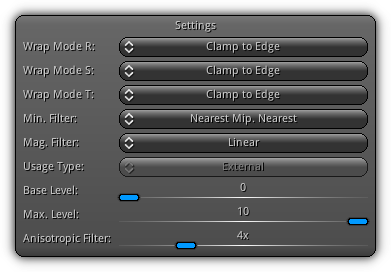
Settings available when a sampler is selected most properties below are the same as the one you have set in New Image Texture and in New Static Cubemap. Refer to the appropriate asset type help for more information; exceptions are listed below.
Wrap Mode RST: Specify the sampler wrapping mode (when texture coordinates go beyond the range of 0 to 1). Take note the R component is only available for texture3D and cube maps.
Base Level: Available for samplers that use mipmaps; this value specifies the highest level of detail the texture can use.
Max. Level: Available the minification filter is above linear; the value specified by this field represents the lowest level of detail can use.
Preview
To learn more about the preview options and controls, please refer to the Preview help more specifically the Texture section.
|
|