
This page of the properties editor allows you to manipulate them settings and functionalities of the active scene currently being edited by the editor.
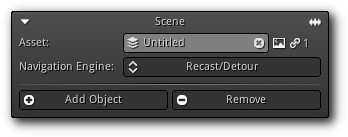
Asset: The current scene asset set for editing. To change for another scene simply type in the name of the scene asset or click the ![]() icon to pop up the list of all existing scene from your library. To change the name of the active scene type in the new name and press
icon to pop up the list of all existing scene from your library. To change the name of the active scene type in the new name and press Enter to confirm. If you wish to unload the active scene (and therefore unload all other sub-scenes that might be associated with it) click the ![]() icon or confirm an empty entry by pressing
icon or confirm an empty entry by pressing Enter.
Navigation Engine: Select the navigation and pathfinding engine to use for the active scene. If the scene does not require such functionalities it is recommended to set the engine to None to avoid consuming extra memory (and processing).
Add Object: Add a new object to the active scene.
Remove: Remove the current object selection from the active scene.
Located at the top right of this section the ![]() icon allow you to force the system to save the active audio effects configuration within the scene file. As a result the audio effects will be loaded along with the scene.
icon allow you to force the system to save the active audio effects configuration within the scene file. As a result the audio effects will be loaded along with the scene.
If a thumbnail is associated to the active scene you can remove it by pressing the ![]() icon; which in turn will force an update next time the scene is dragged onto the view3d.
icon; which in turn will force an update next time the scene is dragged onto the view3d.
Scripts
Allow you to associate scripts to the active scene which will respond to event callbacks that will be emitted by the scene handler itself. Refer to the list below to learn more about what type of events the Scene asset respond to:
| Callback | Description |
|---|---|
OnAdd() | Called every time a new object is added to the scene. |
OnRemove() | Called every time an object is removed from to the scene. |
OnUpdate() | Occurs once per frame (if the scene receive update, see: Active Scenes) after all objects it contains have been updated. |
OnDraw() | Triggered when the scene is about to start drawing the first render layer. |
OnBegin() | Triggered just before the scene is about to draw a new render layer. |
OnEnd() | Happen right after the scene is done drawing a render layer. |
OnDisplay() | Occurs when the scene is done drawing all render layers). |
- Note
- More information about how to manipulate the scripting toolbox is available at Scripts.
Action Controllers
To learn how to use the ActionController section refer to the Object Action Controllers Action Controllers help page.
Render Layers
Probably one of the the most fundamental section of the editor as it controls how your application will draw an image on the screen. This section deals with render layers which works basically like layers in an image manipulation programs.
For each layer, you can set a different camera (or reuse the camera of the previous render layer), a material (if you need to draw on a full-screen quad, especially useful for post-processing effects or compute shader) and have access to multiple options and settings ranging from occlusion to automatic scene geometry adaptation and more...
- Note
- To use the render layer 'resolved' name (layer name + camera) instead of the generic render layer entry index toggle the
 icon.
icon.
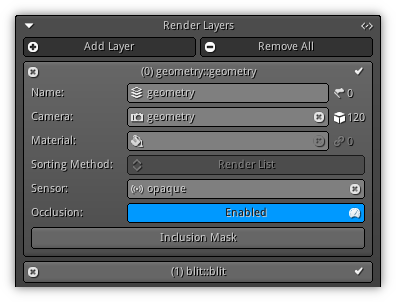
Add Layer: Create a new render layer. To remove an existing render layer from the list click the ![]() icon located on the left side of the slot box header. To toggle on/off the visibility of the render layer use the
icon located on the left side of the slot box header. To toggle on/off the visibility of the render layer use the ![]() icon located on the right side of the slot box header.
icon located on the right side of the slot box header.
Remove All: Remove all render layers contained in the active scene.
Layer Name: A unique name that represent the render layer. To change the name input the new one and confirm using Enter. The number on the far right near the ![]() icon represent the unique bit assigned to the active render layer. To increase or decrease (hold the
icon represent the unique bit assigned to the active render layer. To increase or decrease (hold the Shift key) the bit press the ![]() icon.
icon.
Camera: The camera object to draw the render layer. Either enter the camera name manually or click the ![]() icon to display and populate the list of all existing camera within your scene; click an entry to select. To detach the camera from the render layer simply use the
icon to display and populate the list of all existing camera within your scene; click an entry to select. To detach the camera from the render layer simply use the ![]() icon. The number located on the right side of the control near the
icon. The number located on the right side of the control near the ![]() icon represent the number of object(s) currently present in the render layer's render list.
icon represent the number of object(s) currently present in the render layer's render list.
Material: Specify a material to draw a full-screen quad.
- Note
- When a material is attached to a render layer no geometry will be drawn; only a full-screen quad using the material specified (assuming that the shader is of the type fragment). If the shader used by the material is a compute shader no drawing will occur and the shader will be executed on the GPU. Another possible scenario is when no camera and no material are attached; if the render layer contains some
Probeobject(s) the render pass will assume to be a "probe" pass and all probes will trigger an update.
Sorting Method: Select the sorting method to sort the 'drawable' objects associated with the render layer. To learn more about the available methods please refer to the Sorting Methods table.
Sensor: Instead of generating an object render list from the object visibile from the current render layer camera use the current active list maintained by one of the active camera sensor.
Occlusion: Enable occlusion by rendering all Occluder objects first then the rest of the drawable objects. Once enabled, the Inclusion Mask section will allow you to specify what type of object the occluder(s) can cover. To enable faster but less accurate occlusion queries on supported drivers toggle the ![]() button.
button.
Inclusion Mask: Set the object data type that can be occluded.
- Note
- To reorder the render layer sequence simply drag and drop the slot box header to another one on the list. As a result, the original render layer used to start the drag-drop process will insert itself at the drop location.
- Warning
- For programmers note that enabling occlusion will force the system to clear the active depth buffer.
Sorting Methods
| Method | Description |
|---|---|
| Render List | Use the actual render list as it is displayed inside the Outliner to draw the existing drawable objects attached to the render layer. |
| Front to Back | Sort the drawable front to back when rendering based on their center point distance with the camera attached to the render layer (from the nearest object to the farthest object). |
| Back to Front | Sort the drawable back to front when rendering based on their center point distance with the camera attached to the render layer( from the farthest object to the nearest object). |
| Volume | Render all drawable objects contained on the render layer based on their volume. The Largest object are drawn first then smaller ones. |
| GeometricData | Sort the drawable list using the internal mesh vertex index (ideal when using a mesh library). |
| Priority | Use the drawable object's priority as the key to sort the render list. The rendering sequence will be sorted from the highest object priority to the lowest; ideal for customized early-z culling. |
| Blit | Use the render list of the previous render layer. The system will look backward on for the previous render layer that have a render list to use. |
Sub Scenes
This section allows you to load other scenes automatically when the active scene is loaded. It can only be used on the persistent scene of your application; in other words the first one loaded and currently active.
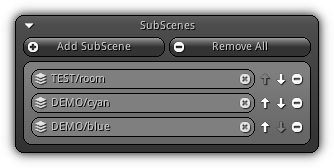
Add SubScene: Create a new sub scene slot.
Remove All: Remove all existing sub scene slot(s).
Once a sub-scene slot have been created it will appear in the list; you can setup which scene should be loaded automatically by pressing the ![]() icon. This action will populate the scene asset list where you can select one. In order to disconnect a scene asset press the
icon. This action will populate the scene asset list where you can select one. In order to disconnect a scene asset press the ![]() icon or input an empty scene name.
icon or input an empty scene name.
To change the loading sequence of the sub scene slot you can either the ![]() or
or ![]() icon to increase or decrease the slot priority. To remove a specific slot press the
icon to increase or decrease the slot priority. To remove a specific slot press the ![]() button located on the far right of the slot entry in the list.
button located on the far right of the slot entry in the list.
- Warning
- Scenes loaded this way are not loaded asynchronously; dynamically load scene on the fly without blocking your application see Region.
Bounds
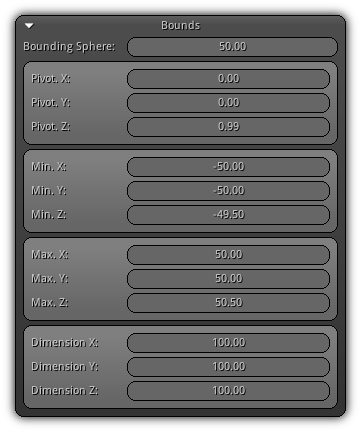
Bounding Sphere: The size of the scene bounding sphere.
Pivot XYZ: The center point of the scene in world space coordinates.
Min. XYZ: The minimum XYZ coordinate of the axis-aligned bounding box of the scene in world coordinates.
Max. XYZ: The maximum XYZ coordinate of the axis-aligned bounding box of the scene in world coordinates.
Dimension XYZ: The size of the AABB for the active scene on all world axis.
Object Groups
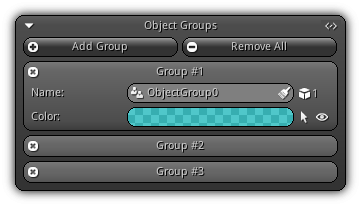
This section allows you to create groups of objects providing a quick way to visually identify, select or toggle the visibility of multiple objects in a single action (or line of code). To learn more about how to assign an object to an existing please refer to the Object Groups section of the View3d help.
- Note
- If you wish to display the 'resolved' name of the object group instead of the generic entry index toggle the icon.
Add Group: Create a new empty object group. To manually remove a specific group within the entry list click on the ![]() icon located on the left side of the group slot box header.
icon located on the left side of the group slot box header.
Remove All: Remove all existing object groups.
Name: Specify a unique name for the object group. To change the existing name input a new one then press Enter to confirm. To detach all objects currently associated with the active group; click the ![]() icon. As a reference; located on the right side of the control the number near the
icon. As a reference; located on the right side of the control the number near the ![]() icon represents how many objects are currently contained within the group.
icon represents how many objects are currently contained within the group.
Color: A unique color to visually identify all objects that are contained within the group from the 3d viewport (will override the default selection/object color). On the right side of the color bar the ![]() icon allows you to visually see if all objects that are currently selected or not. To select (or deselect) them simply click the icon. Same apply for the
icon allows you to visually see if all objects that are currently selected or not. To select (or deselect) them simply click the icon. Same apply for the ![]() which controls/display the active visibility state of the objects contained in the group.
which controls/display the active visibility state of the objects contained in the group.
- Note
- When changing states you can either invert the group selection or visibility by holding
Shift, or synchronize the selection state by holdingAlt+Shift.
Sound Groups
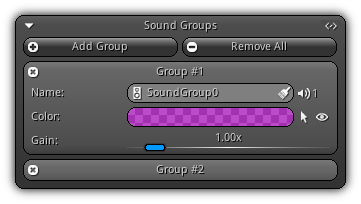
Similar to Object Groups, sound groups also allow you to categorize multiple sound sources into a single group. These groups are either used at editing time to simplify the selection and visualization of all sounds contained with the same group and/or can also be used (as the for the Audio Mixer) to adjust the gain of all sounds contained in the group all at once.
- Note
- If you wish to display the 'resolved' name of the sound group instead of the generic entry index toggle the icon.
Add Group: Create a new empty sound group. Once a sound group is created if you wish to remove it click on the ![]() icon located on the left side of the group slot box header.
icon located on the left side of the group slot box header.
Remove All: Remove all existing sound groups.
Name: Specify a unique name to use for the sound group. To change the existing name input a new one then press Enter to confirm. To detach all the sound sources currently contained in the group click the ![]() icon. As a reference; located on the right side of the control the number on the right side of the
icon. As a reference; located on the right side of the control the number on the right side of the ![]() icon represents how many sources are currently attached to the group.
icon represents how many sources are currently attached to the group.
Color: A unique color to visually identify all the sources contained within the group (will override the default wireframe color). The ![]() icon allows you to visually see if all sources are currently selected or you can click it to select/deselect all elements of the group. Same apply for the
icon allows you to visually see if all sources are currently selected or you can click it to select/deselect all elements of the group. Same apply for the ![]() which controls/display the active visibility state of all sounds in the group.
which controls/display the active visibility state of all sounds in the group.
- Remarks
- Same as for
ObjectGroupsyou can invert the group selection or visibility state by holdingShift, or synchronize it by holdingAlt+Shift.
Gain: Allow you to manually affect the gain of all sound sources within the group by specifying an additional gain factor. Therefore all active sound gains will be multiplied with the sound group gain increasing or decreasing their volume.
Member Variables
Learn how to use the Member Variables section by visiting the Object Member Variables help page.
3d Cursor
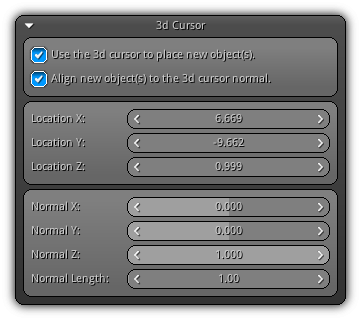
The 3d cursor allows you to either visually pinpoint a position (and visualize its normal) of an arbitrary location within your 3d scene and give you the opportunity to use that location to place a new object(s).
Use the 3d cursor to place new object(s).: Specify whether new object should be placed at the location of the 3d cursor when created.
Align new objects to the 3d cursor normal.: Allow you to use the normal at the 3d location to calculate a 3x3 rotation matrix aligning to the new object using this transformation.
Location XYZ: The active 3d cursor location in world space. To modify it manually simply input new values; press Enter to confirm.
Normal XYZ: Represent the vertex normal under the 3d cursor. Use the right click button to drag value or input the value manually.
Normal Length: Adjust the size of the 3d representation of the normal in the view3d depending on your scene units.
- Note
- More information about the 3d cursor can be found under the 3d Cursor help section.
Debug Draw
This section allows you to determine what type of visual scene debugging information you want the View3d viewport to display while being in edit mode. Each area can be enabled or disabled independently by clicking the ![]() icon (located on the right side of the section slot box) which will cause all selected debug drawing of the section to be either turned on or off.
icon (located on the right side of the section slot box) which will cause all selected debug drawing of the section to be either turned on or off.
Shapes
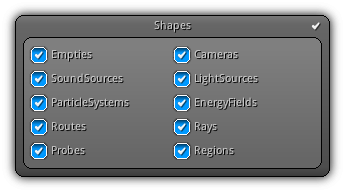
Select which object data shapes should be debugged draw.
Object Bounds
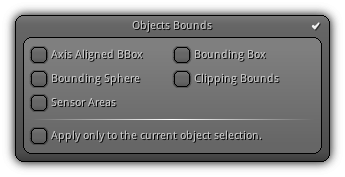
Axis Aligned BBox: Draw the axis-aligned bounding box of the object.
Bounding Box: Draw the bounding box of the object.
Bounding Sphere: Draw the bounding sphere that encapsulates the object.
Clipping Bounds: Draw the type of bounds that is used internally to test the visibility of the object against the camera frustum.
Sensor Areas: Draw the area surrounding the object handled by its associated sensor.
Use the `Apply only to the current object selection.` checkbox to constraint
debug drawing to the active object selection only.
Draw Relationships
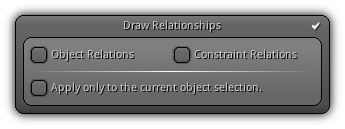
Object Relations: Use a dashed line between parent and child to debug draw their relationship.
Constraint Relations: Enable debug draw of object constraints.
Use the `Apply only to the current object selection` checkbox to restrict
debug drawing to be applied only on the current objects that are selected.
Misc. Drawing
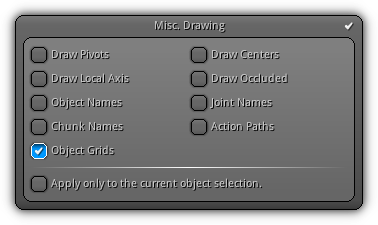
Draw Pivots: Draw the object pivot point.
Draw Centers: Draw the object bounding box center point.
Draw Local Axis: Draw the axis aligned (the object local rotation) axes.
Draw Occluded: Draw using wireframes occluded drawable objects meshes or debug shape(s).
Object Names: Draw the name of the object(s).
Joint Names: Draw the skeleton joint(s) name.
Chunks Names: Draw the name of each chunk of a fractured mesh.
Action Paths: Draw all location paths contained in the active action selected (ideal to debug sequences).
Object Grids: Debug draw all the Obejct Grids of the active Scene.
`Apply only to the current object selection.`, give the opportunity to restrict
the drawing to only selected objects (when it applies).
|
|